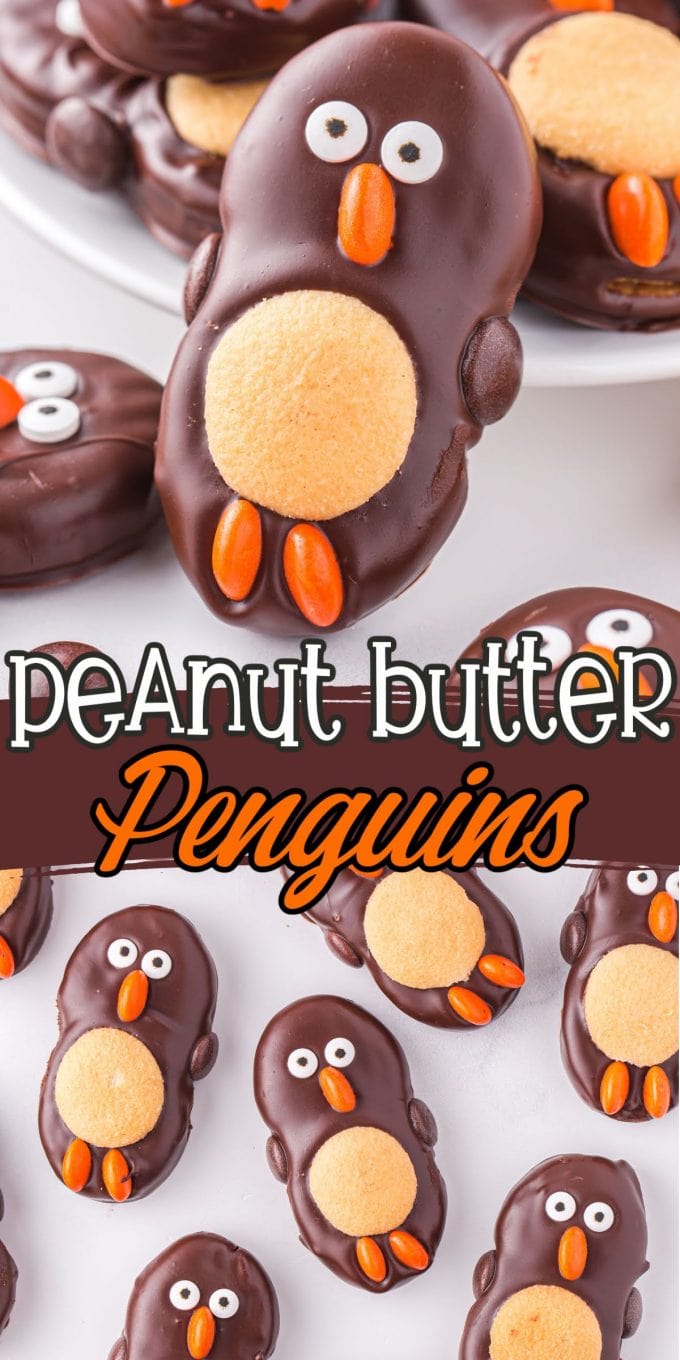
This Peanut Butter Penguins Christmas cookie recipe easily turns a store-bought sandwich cookie into the season’s cutest critter from the South Pole. Simply coated in chocolate and dressed up as an adorable bird that waddles when it walks, these cookie creations make a fun, kid-friendly, no-bake project that produces perfectly edible penguins! No Cookie Swap should be without them!
No-Bake Peanut Butter Penguins – The cutest Christmas Cookie
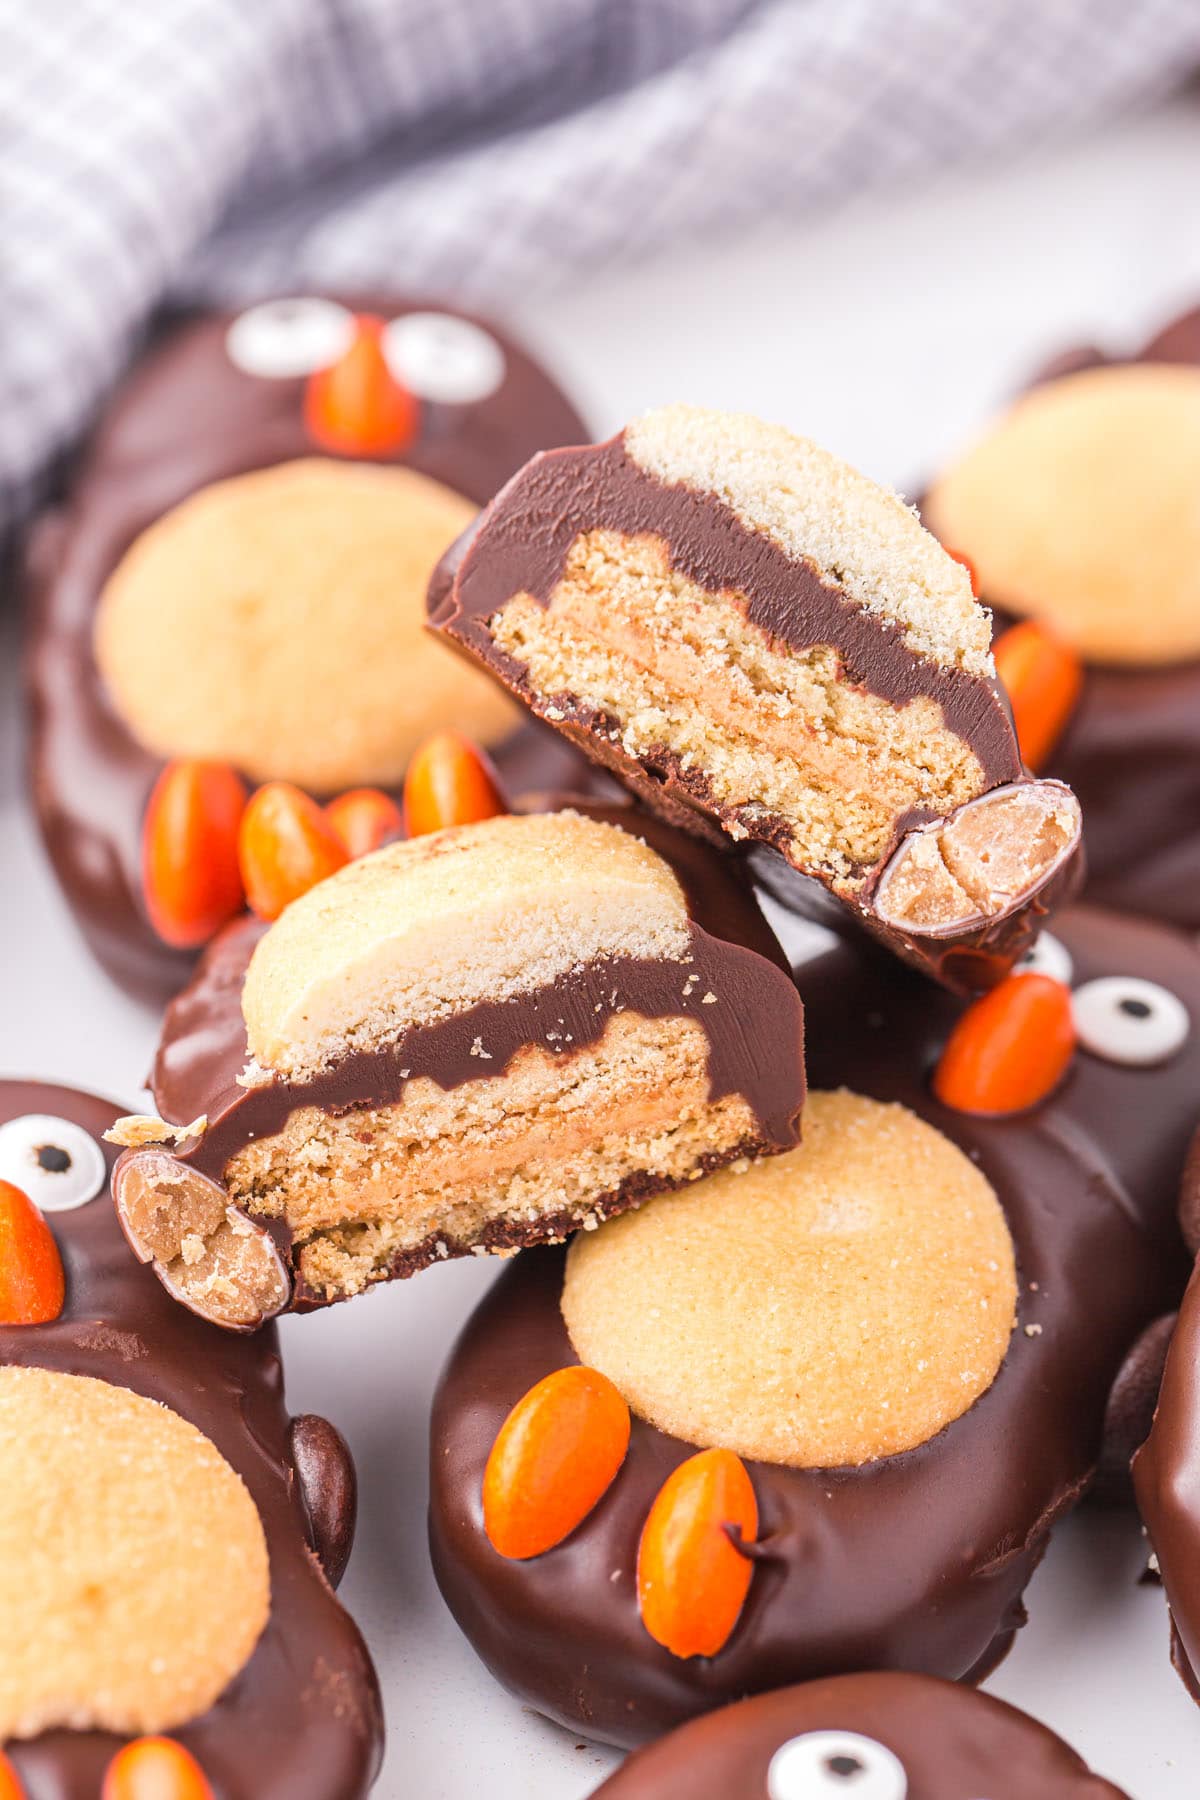
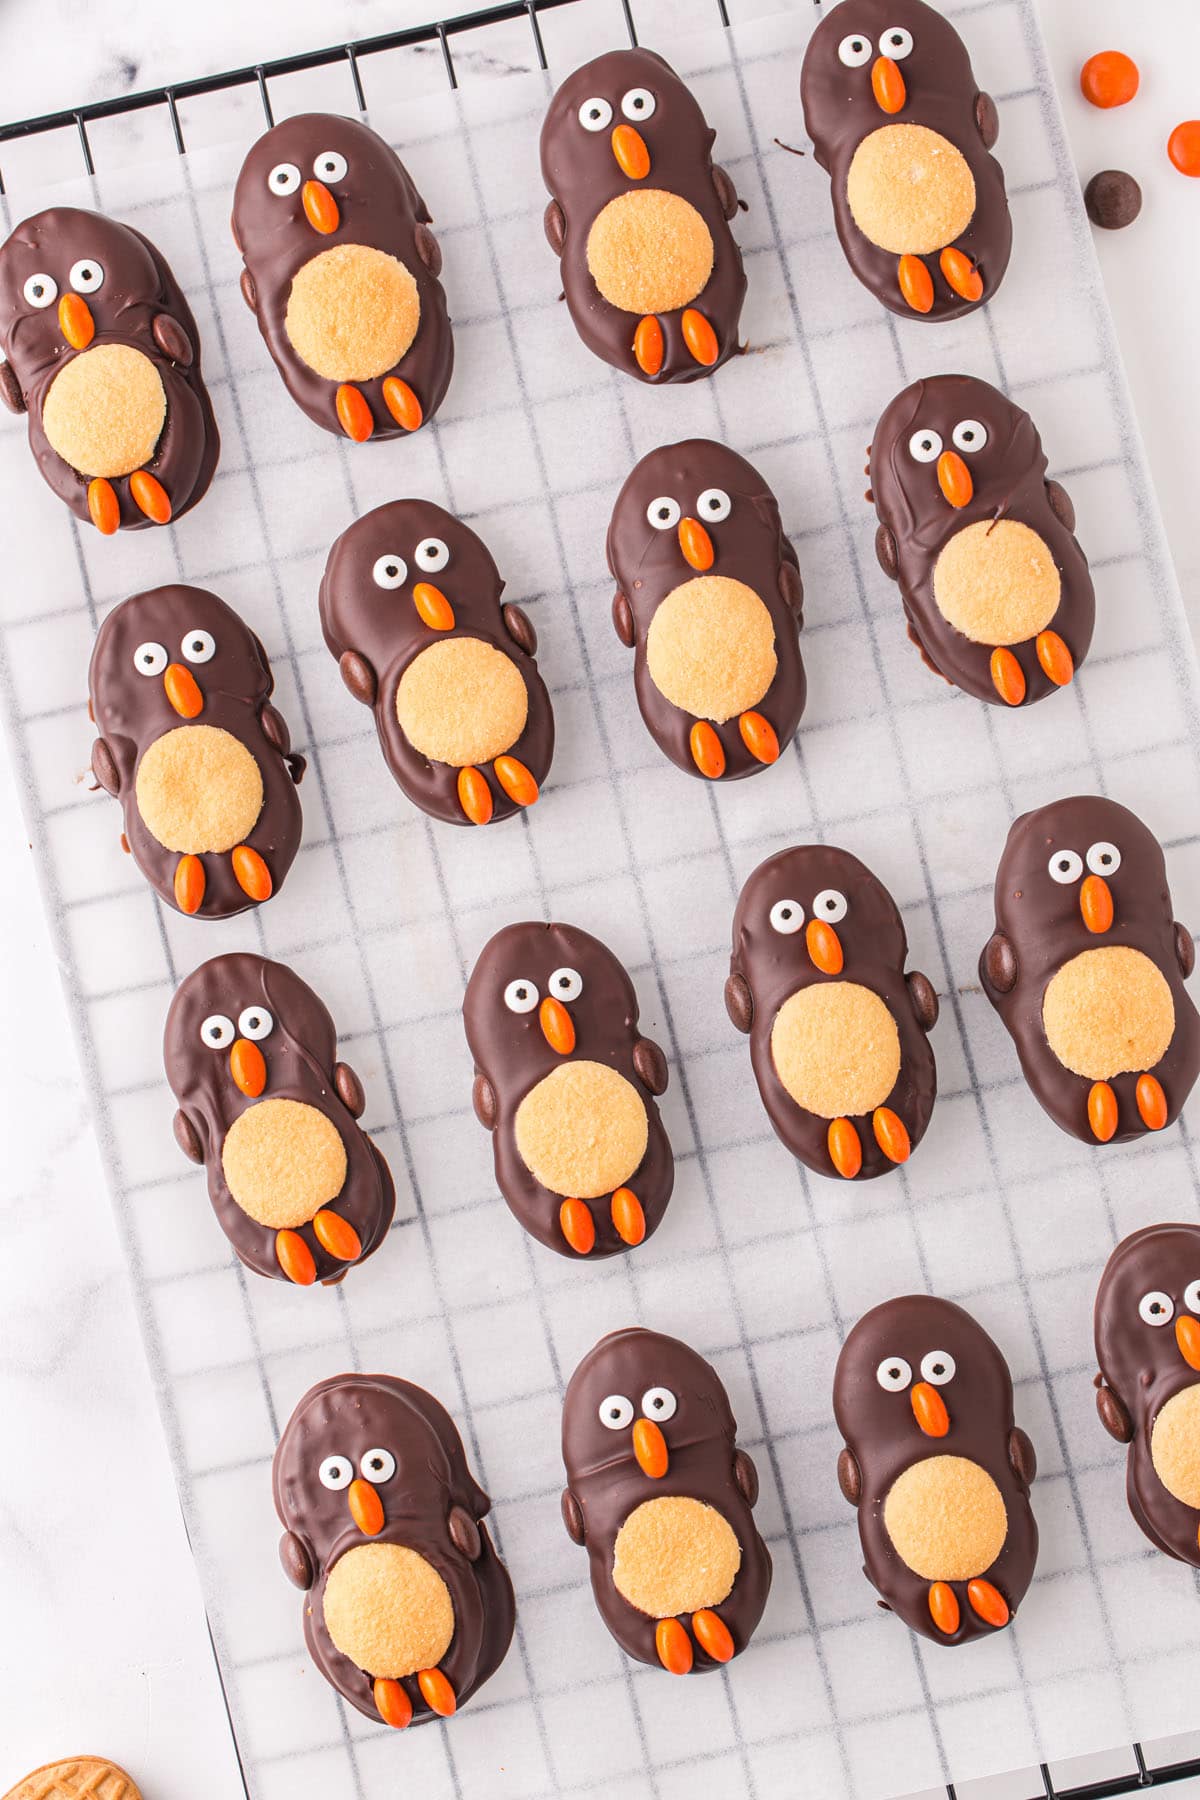
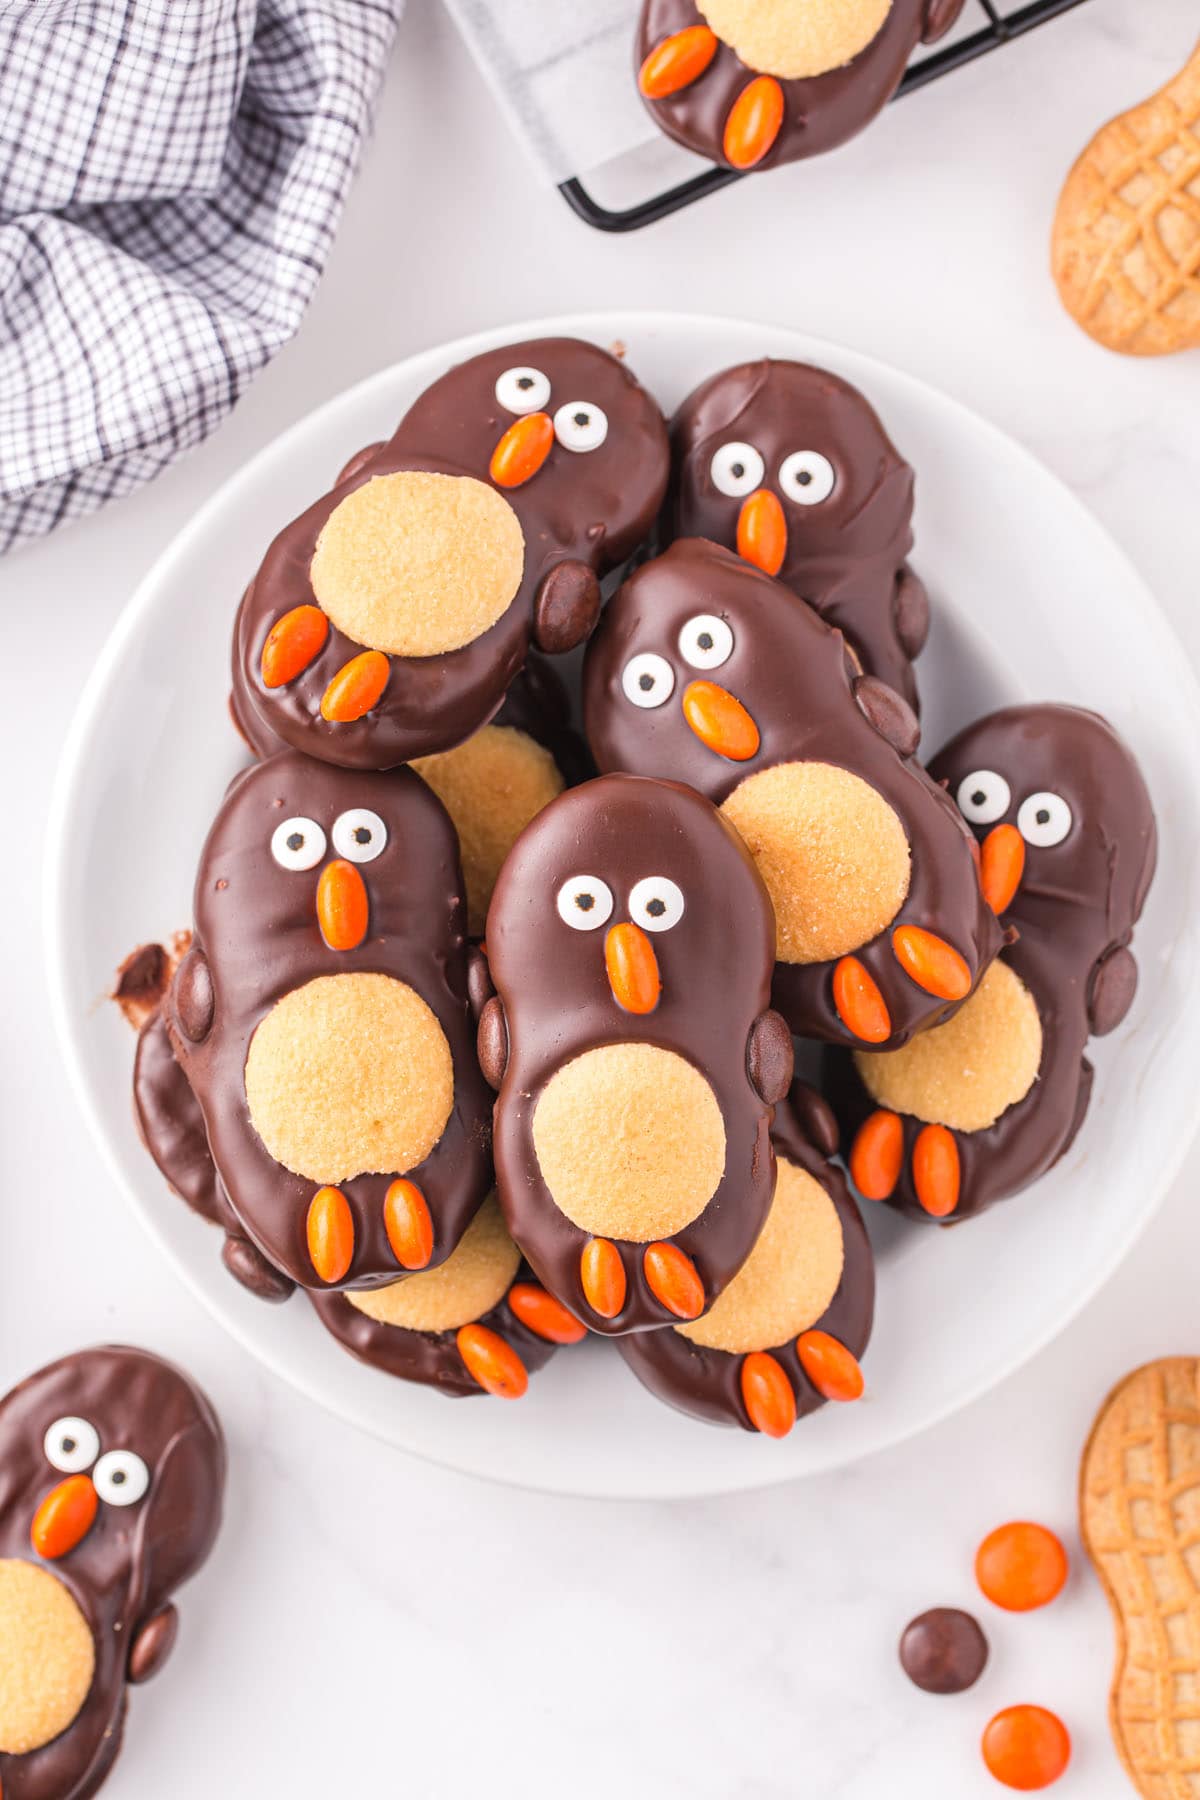
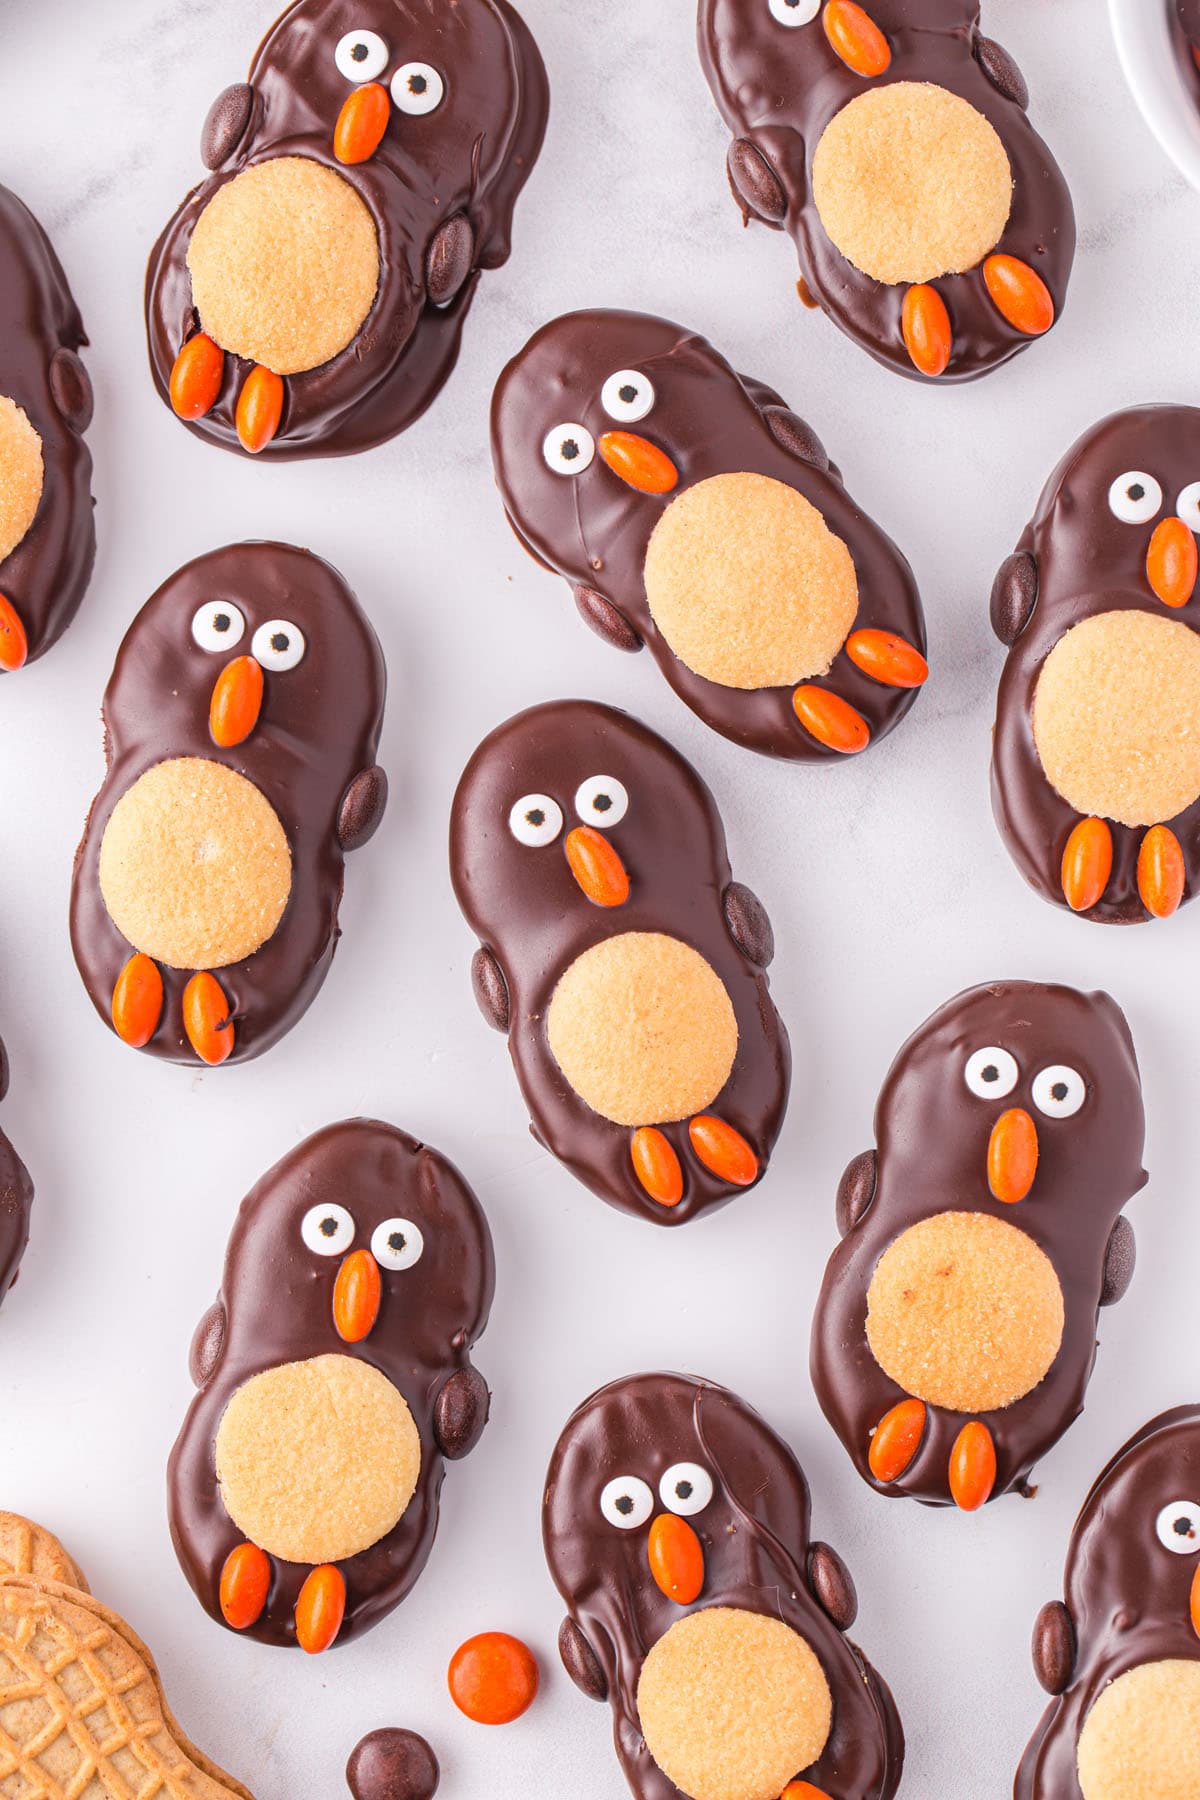
It is so easy to make Peanut Butter Penguins simply by bathing Nutter Butter cookies in chocolate and then transforming them into cute cold-weather characters that we like to consume at Christmas.
I love the classic flavor combination of chocolate and peanut butter in this edible bird–a popular pairing that makes the perfect penguin!
Decorating a cookie to celebrate the holidays is always a fun way to bring food to life. Little fingers may be covered in melted chocolate and too much candy may be munched, but isn’t that the best part of spending time with kids in the kitchen?
Peanut Butter Penguins are a delightfully sweet winter treat that tastes delicious and almost looks too cute to eat!
Why We Love This Christmas Cookie Recipe
- Easy to make because they are no-bake.
- Only uses 5 ingredients plus candy decorations.
- Fun to make and decorate with kids.
- Delicious combination of peanut butter and chocolate makes the perfect penguin.
- Great for a holiday or winter-themed party, cookie exchange, or to celebrate National Penguin Day on January 20th
Ingredients / Shopping List
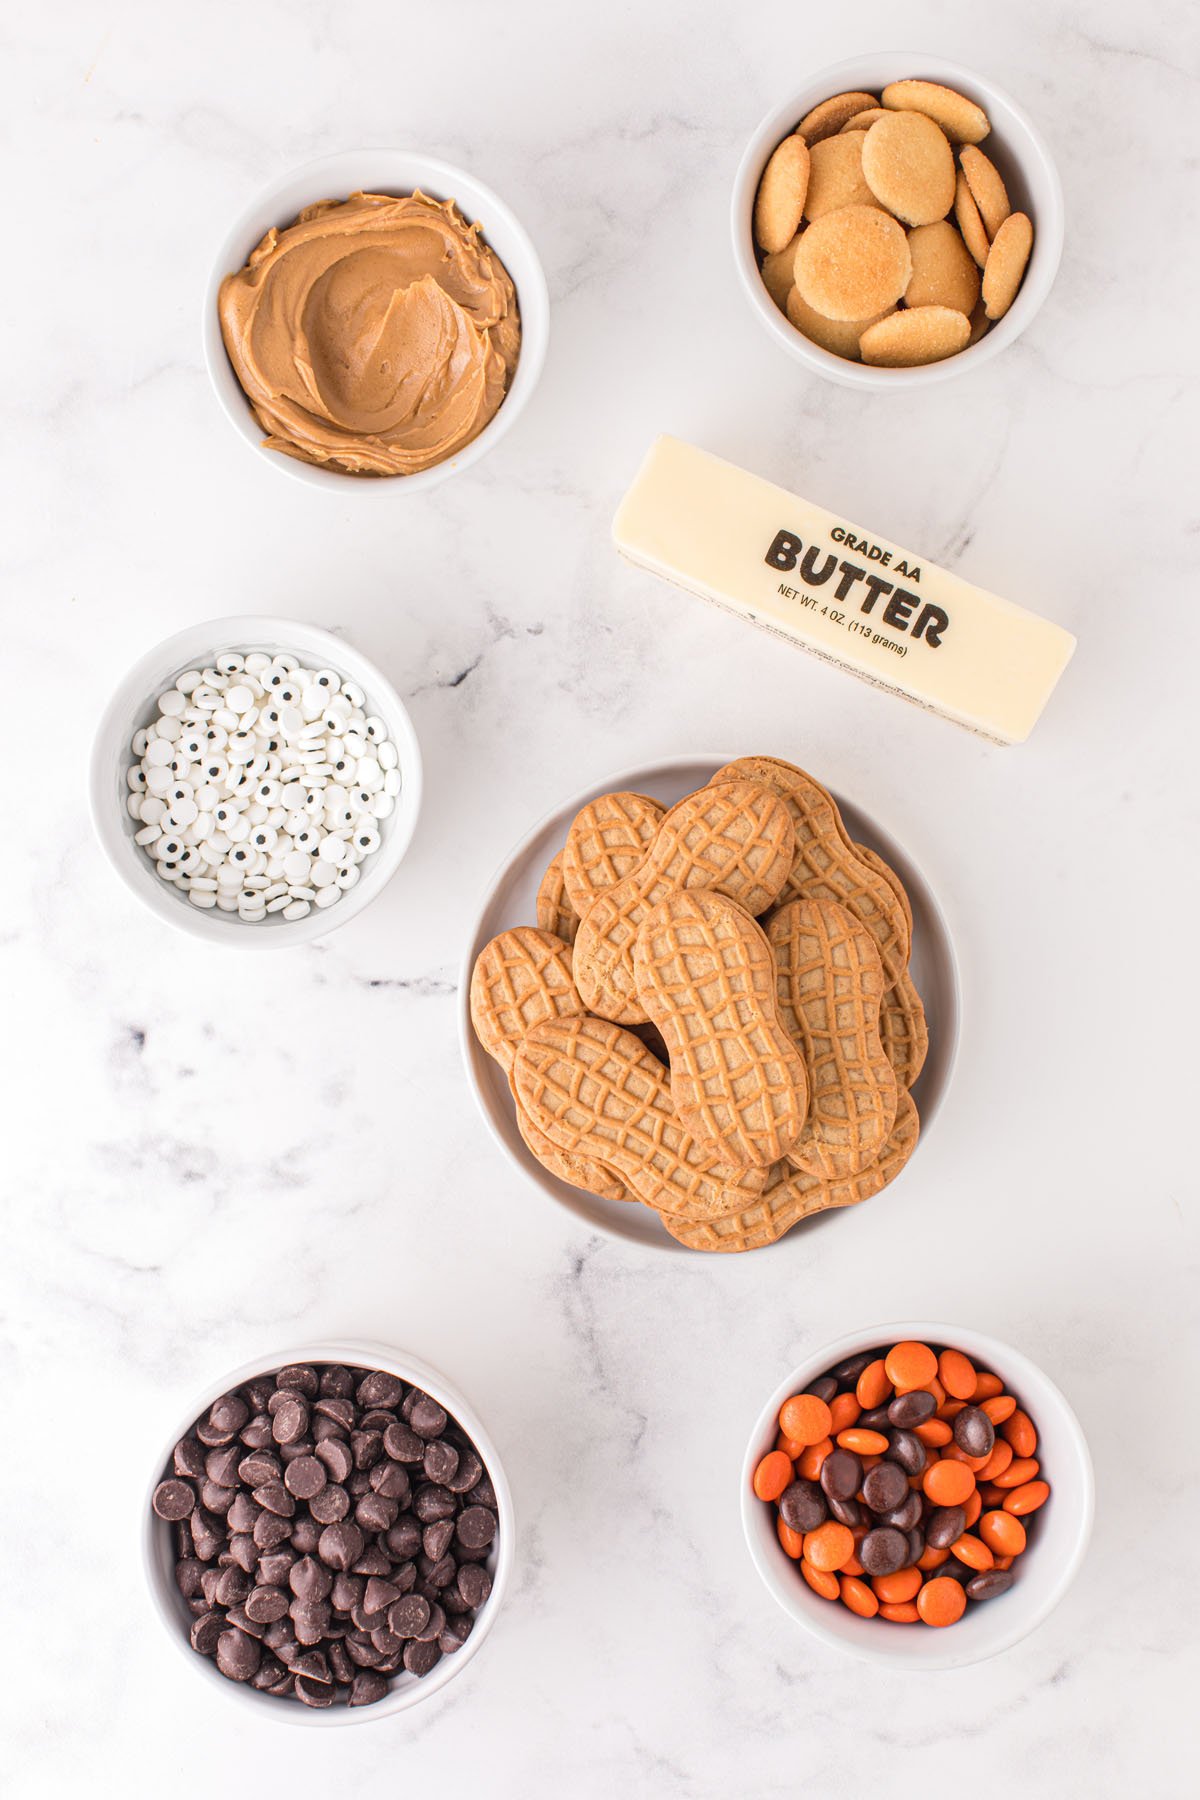
- Dark chocolate chips: You can substitute any chocolate chip for this but it will change the end color of your penguins.
- Creamy peanut butter
- Salted butter: You can use unsalted butter but the salt helps balance out the sweetness a little bit.
- Nutter Butter cookies
- Mini Nilla Wafers: You can substitute white candy wafers if you prefer.
- Brown Reese’s pieces: You can buy a theater box or sharing size bag and that should provide enough of each color.
- Orange Reese’s pieces, halved: You can substitute M&Ms for the orange and brown pieces if you prefer.
- Candy eyes
Substitutions and Additions
- Penguin Parts: Get creative with your candy and make your own version of the perfect penguin.
- Belly: Instead of using a mini Nilla Wafer, you can make a marshmallow or white chocolate melt belly.
- Wings: Feel free to use tootsie rolls, orange taffy, or orange Starburst Fruit Chews to create wings.
- Beak and Feet: A cut up Circus Peanut or M&Ms can make a cute beak or some feet.
- Cookie or Cracker: I love the shape of Nutter Butter Cookies for this recipe, but feel free to decorate any other oval-shaped cookie, biscuit, or cracker. Some ideas include Milano cookies, Vienna Fingers, or Town House Crackers.
Recommended Tools
- Mixing bowl and tools
- Measuring tools
- Wire rack or cutting board
- Parchment paper
SEE FULL PRINTABLE RECIPE CARD BELOW
How to Make Peanut Butter Penguins
It is so easy to make Peanut Butter Penguins simply by coating Nutter Butter cookies in chocolate and then transforming them into cute cold-weather characters. A fun, kid-friendly decorating project produces deliciously perfect edible penguins!
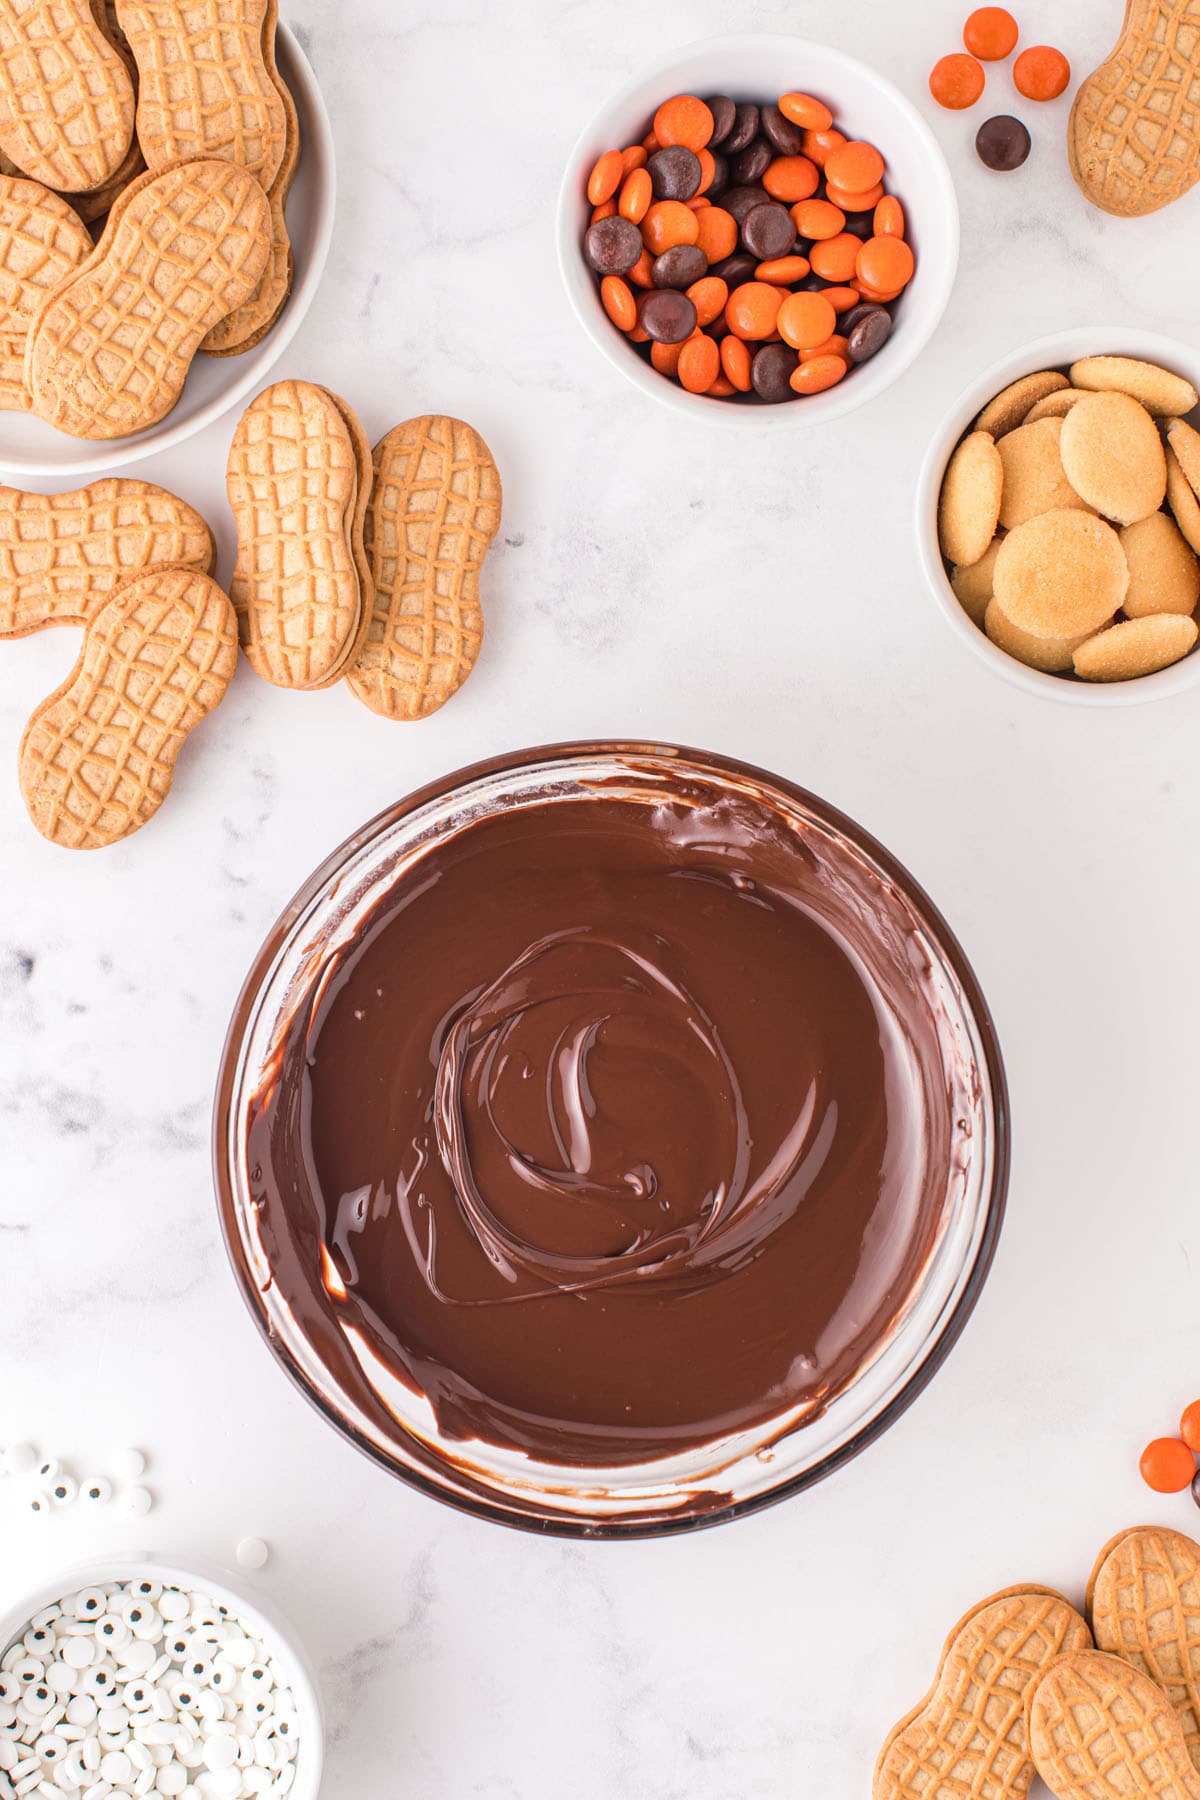
- Add chocolate chips, peanut butter, and butter to a microwave safe bowl and heat until completely melted.
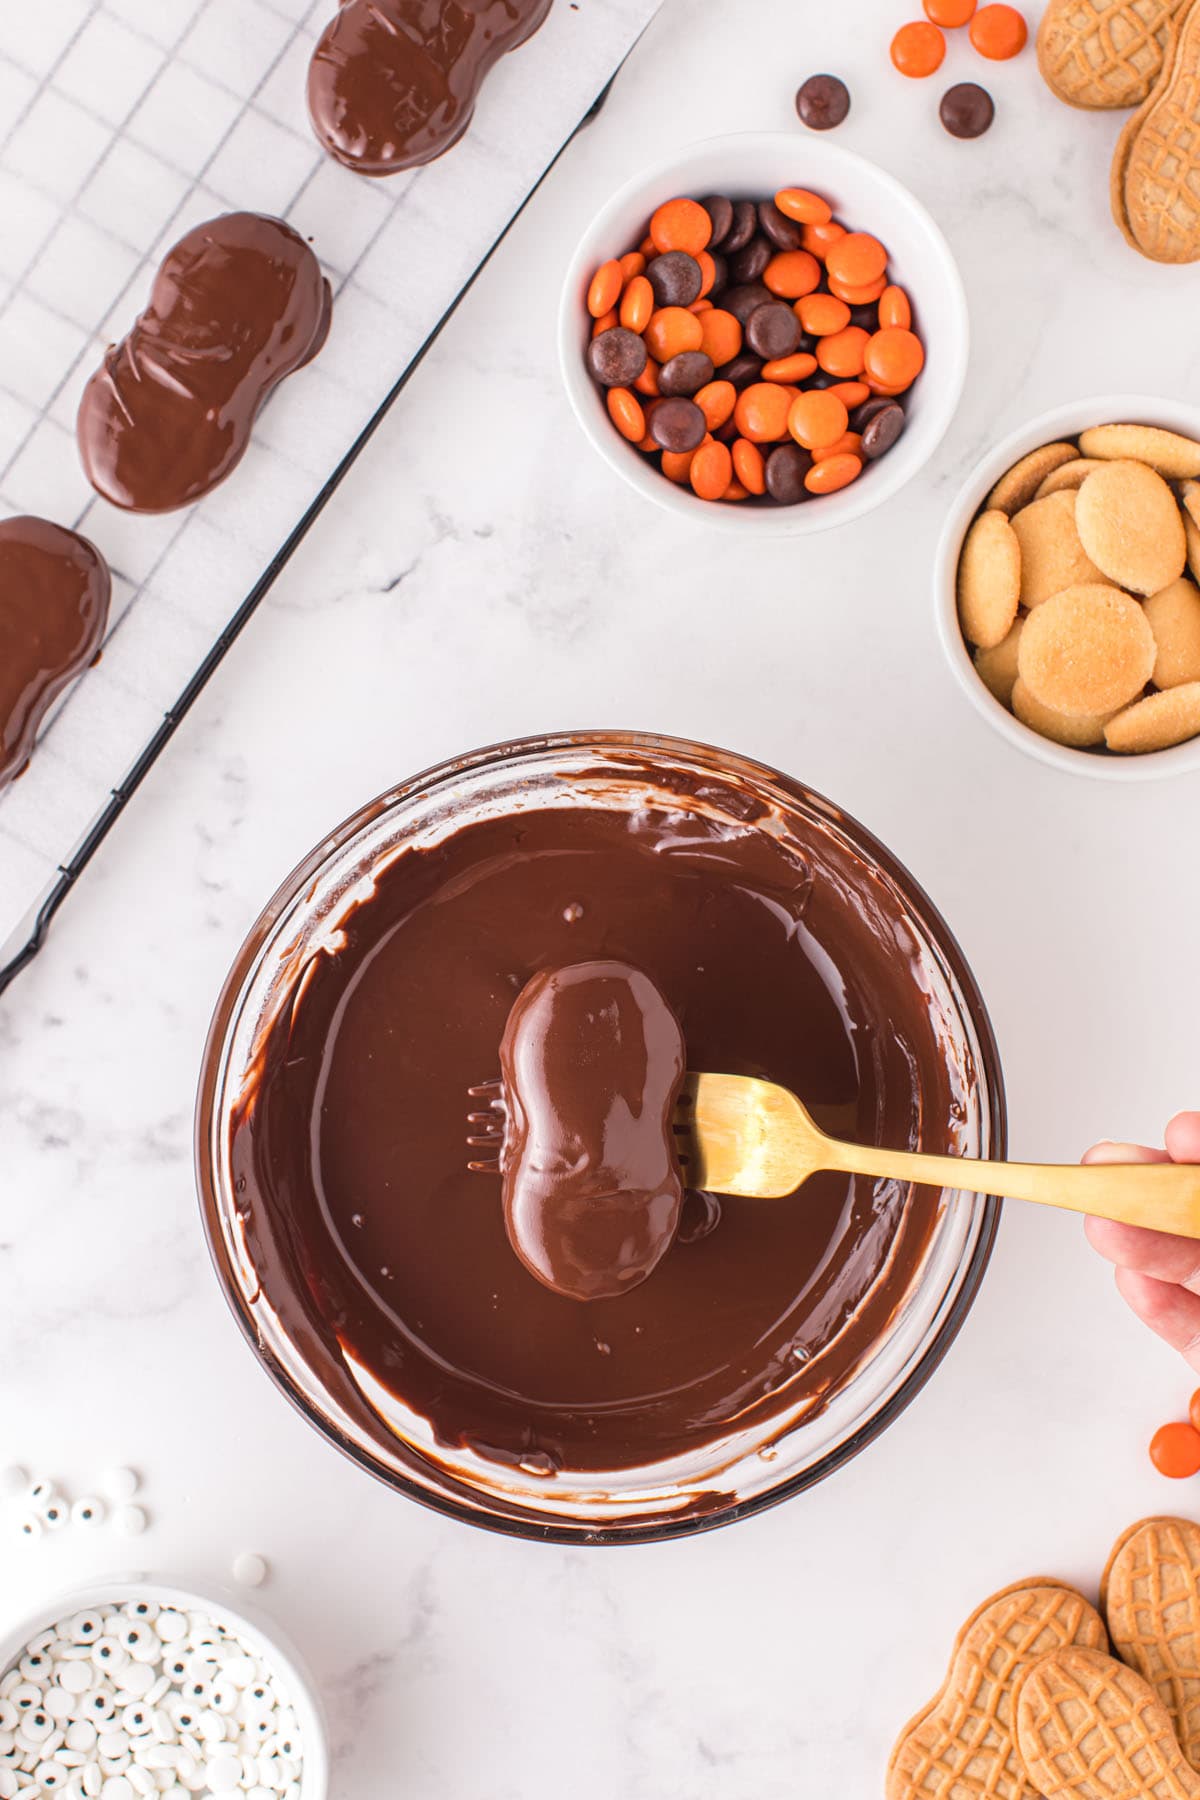
Pro Tip: Microwave for 30 seconds, stir, and continue to heat in 10-15 second increments, stirring between each increment. Don’t overheat your chocolate! The peanut butter and butter will make it much more forgiving but you still don’t want to overheat it. - Submerge each Nutter Butter in the chocolate mixture and lift with a fork when completely covered.
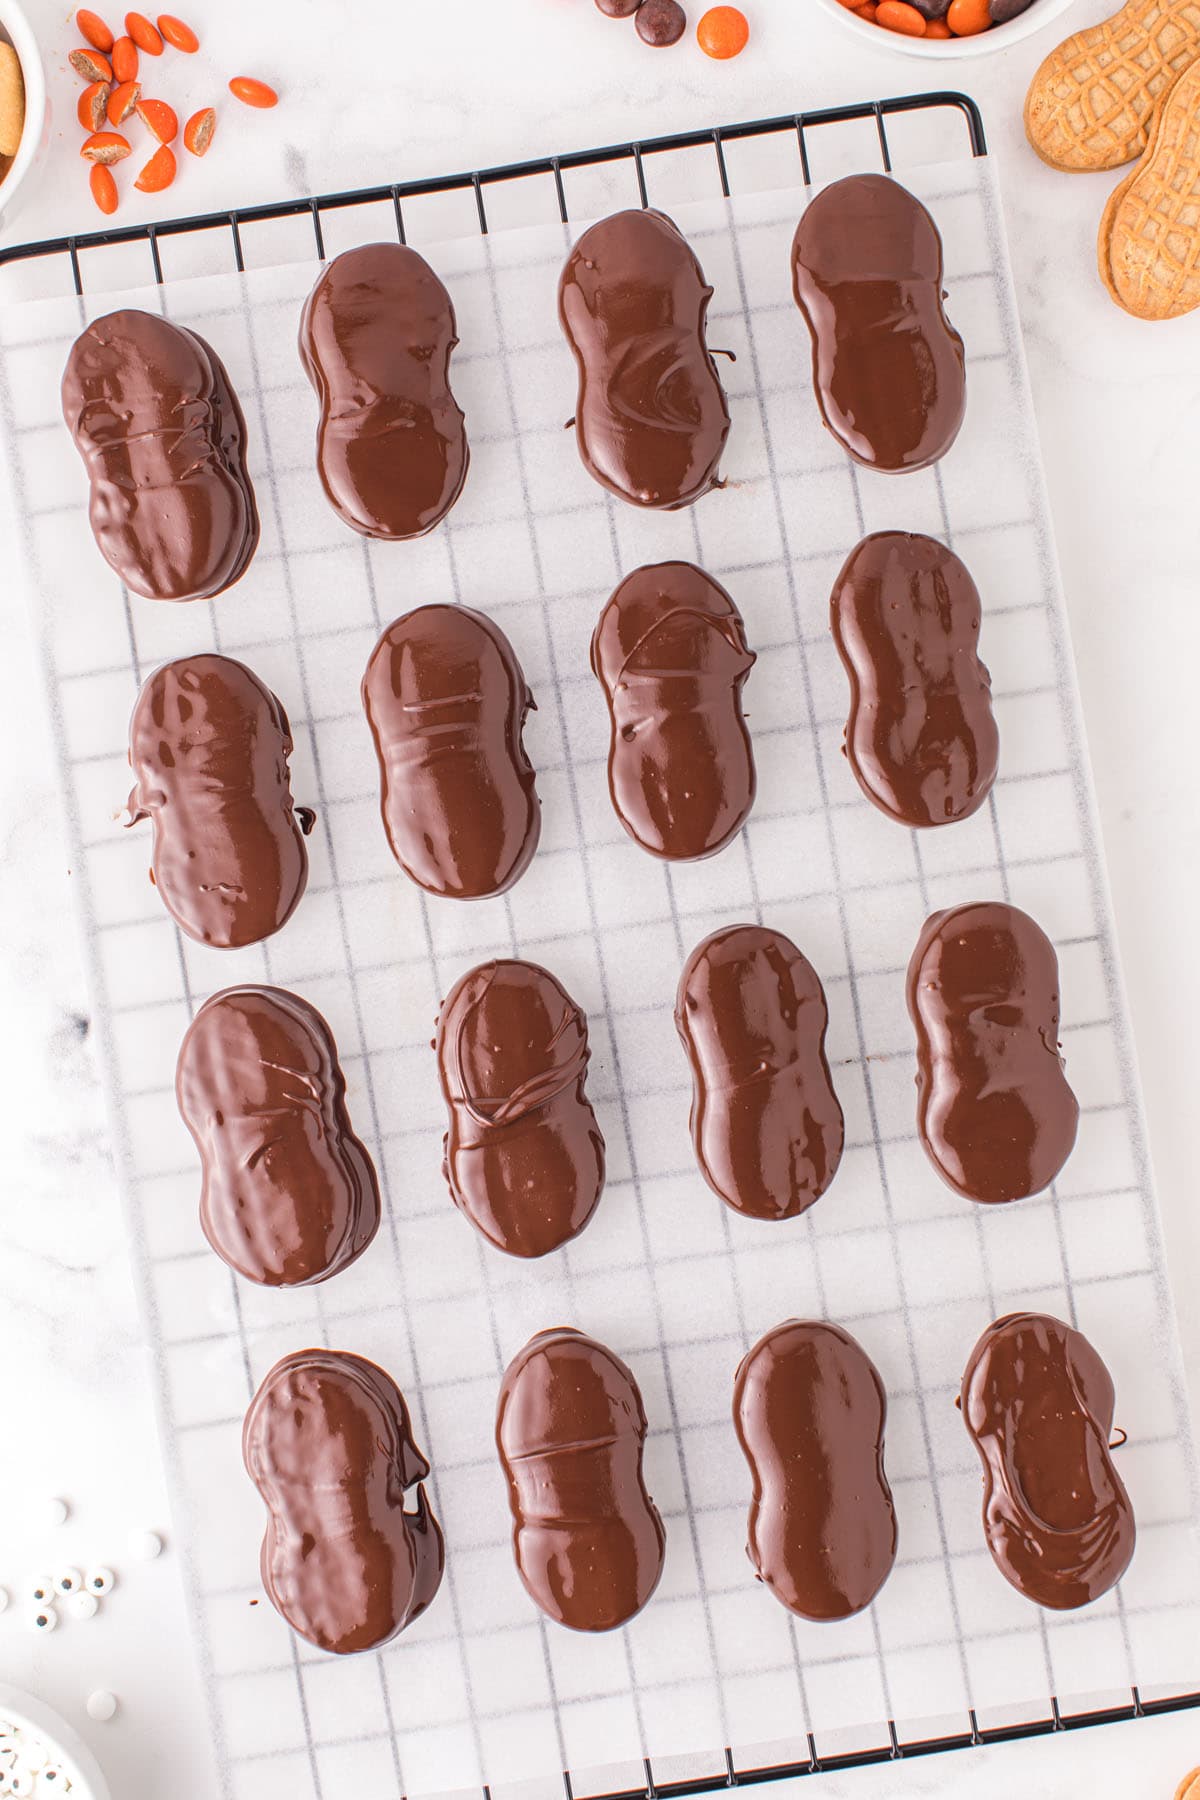
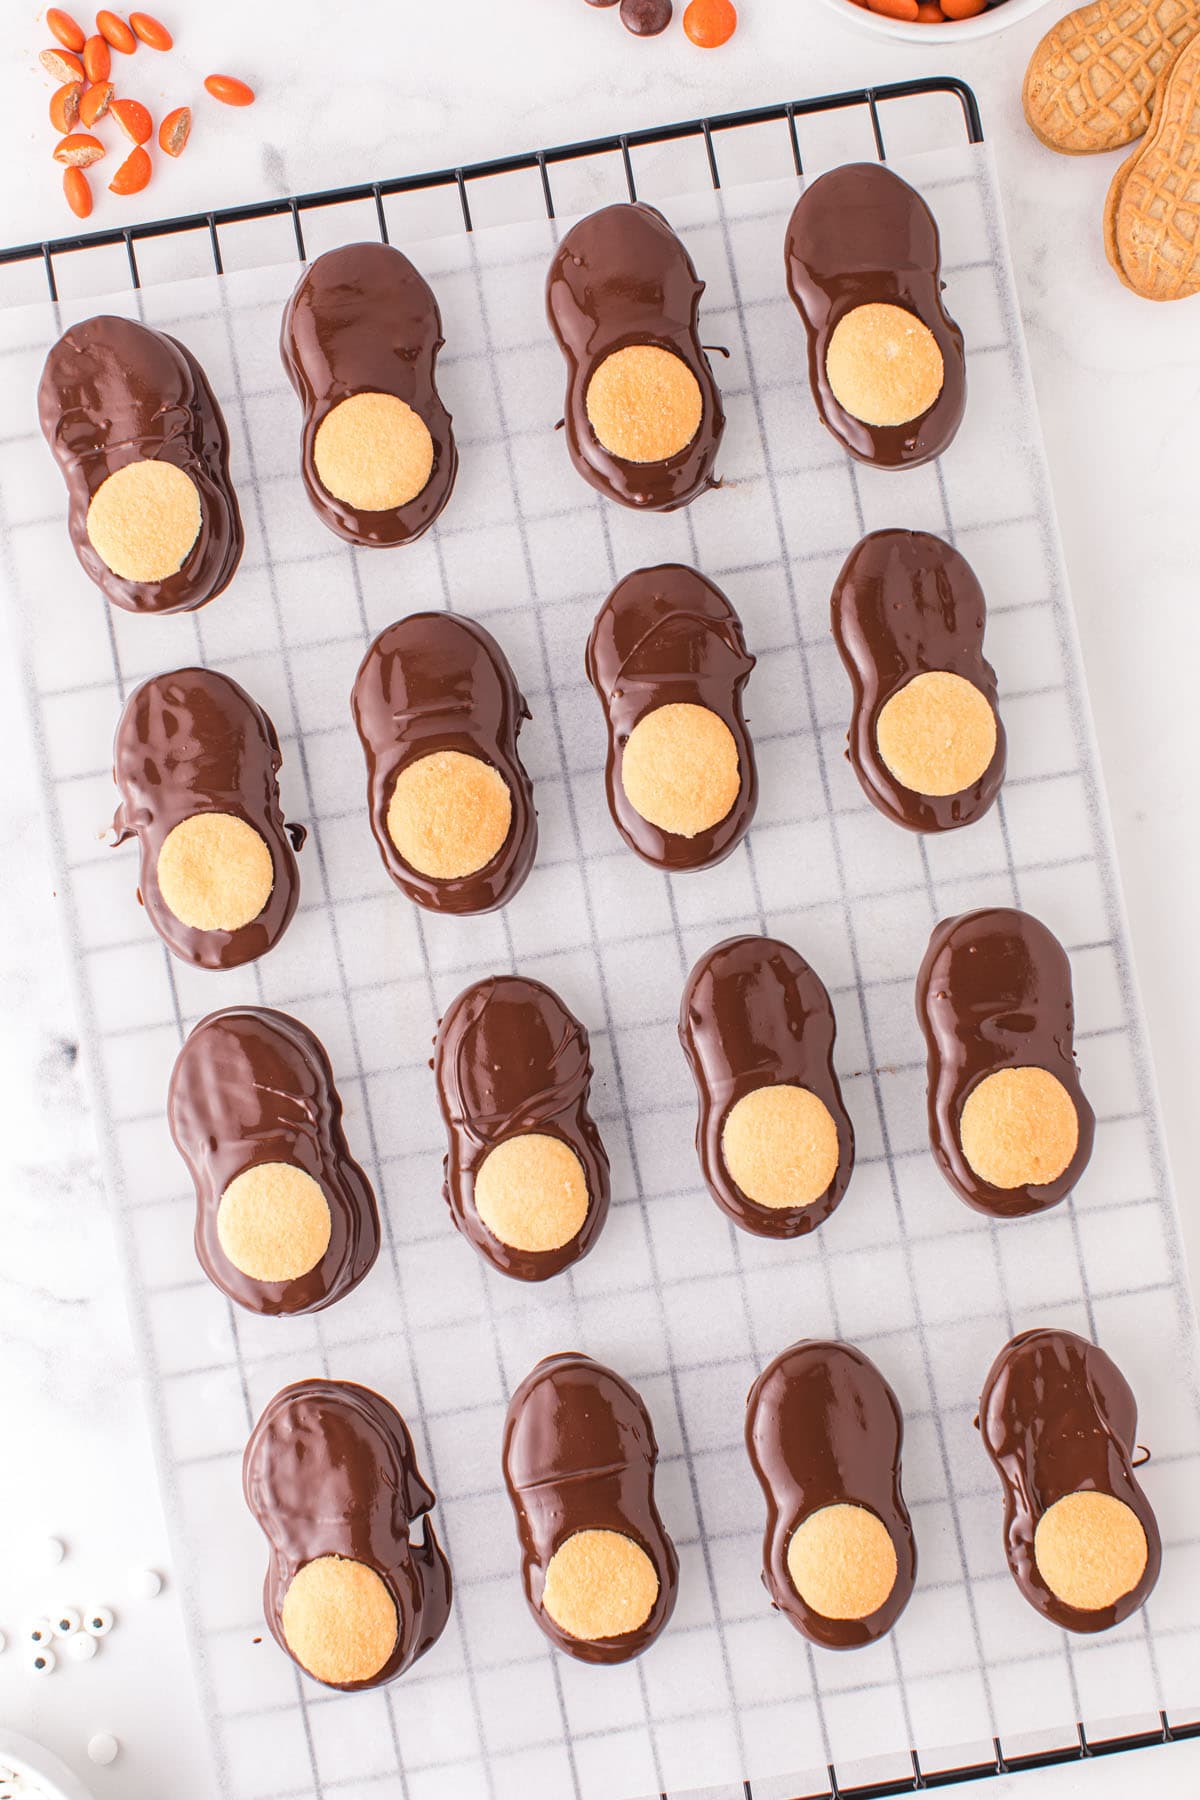
- Set dipped cookies on a wire rack or cutting board covered with parchment paper.
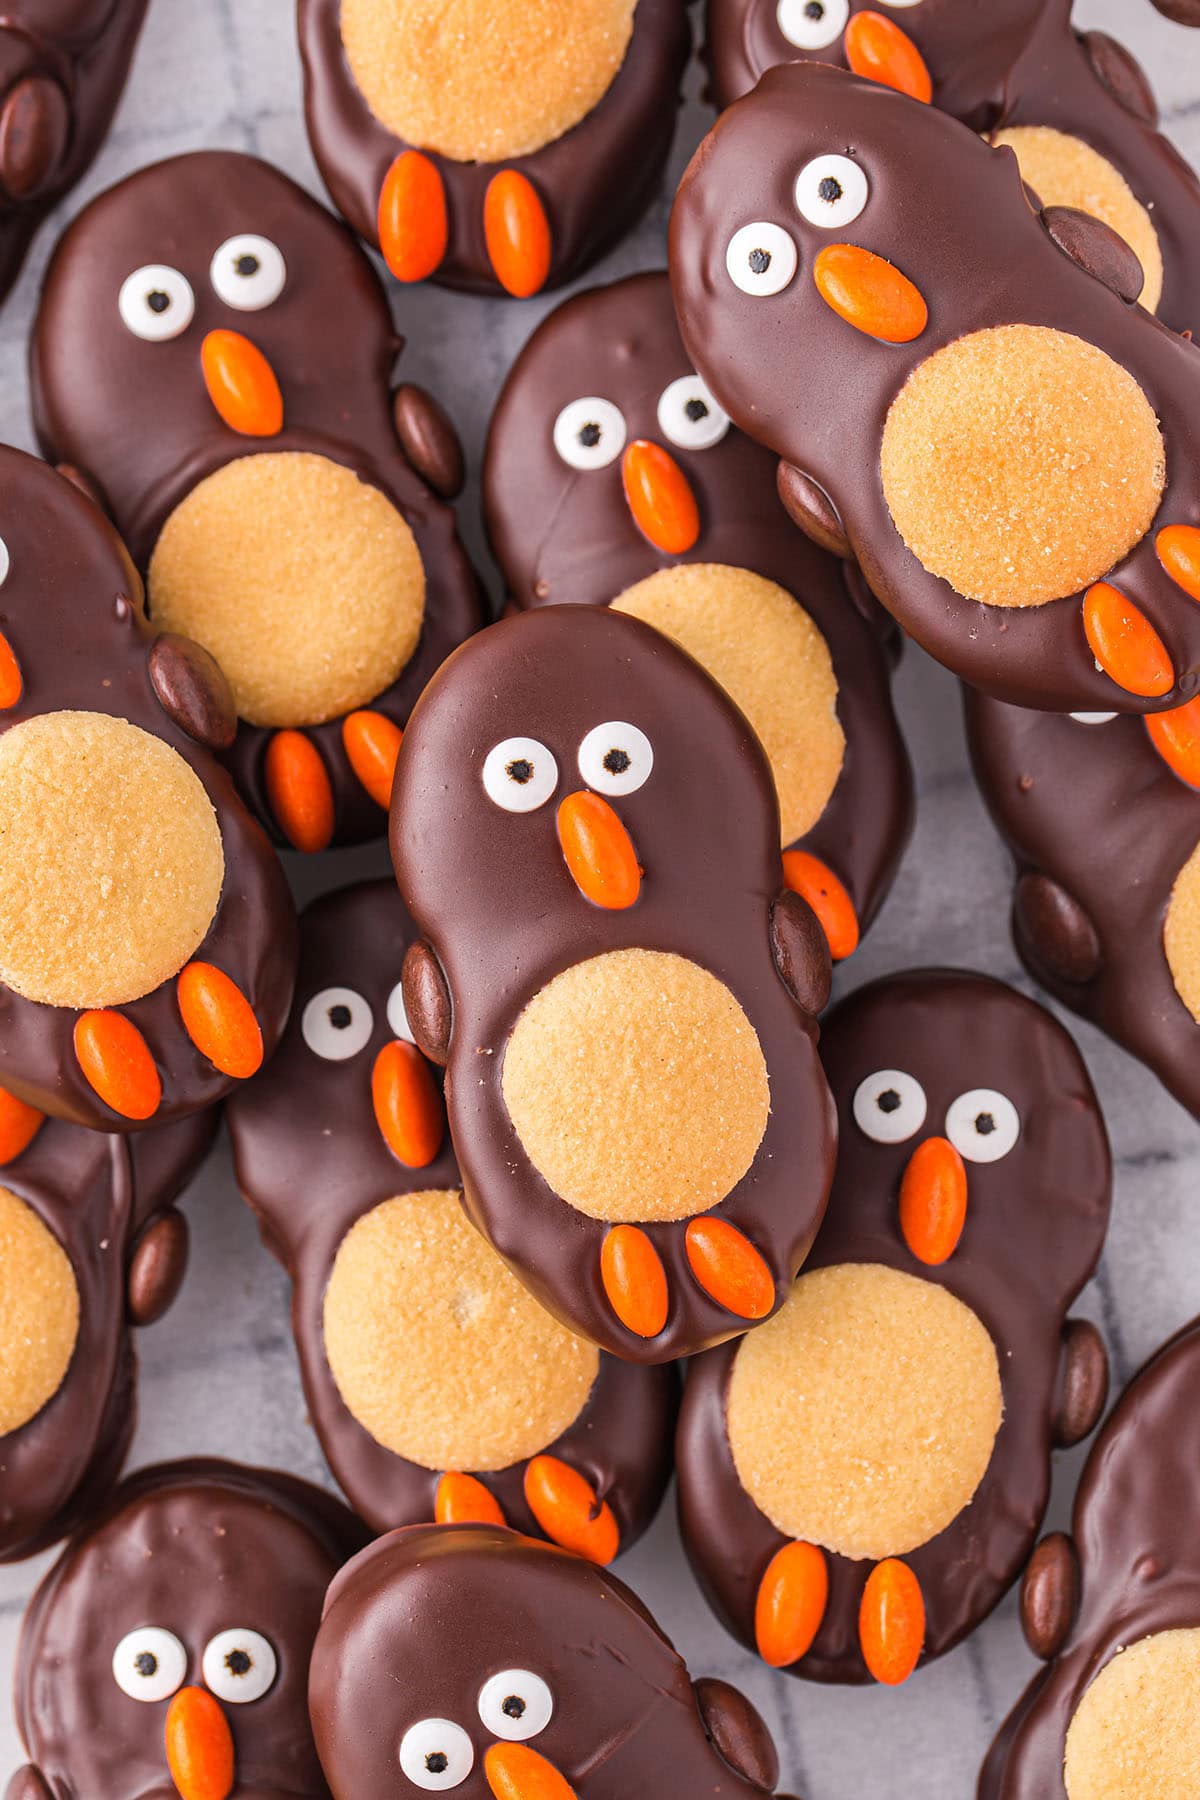
- Place a mini Nilla wafer “stomach” on the center of the bottom half of each cookie.
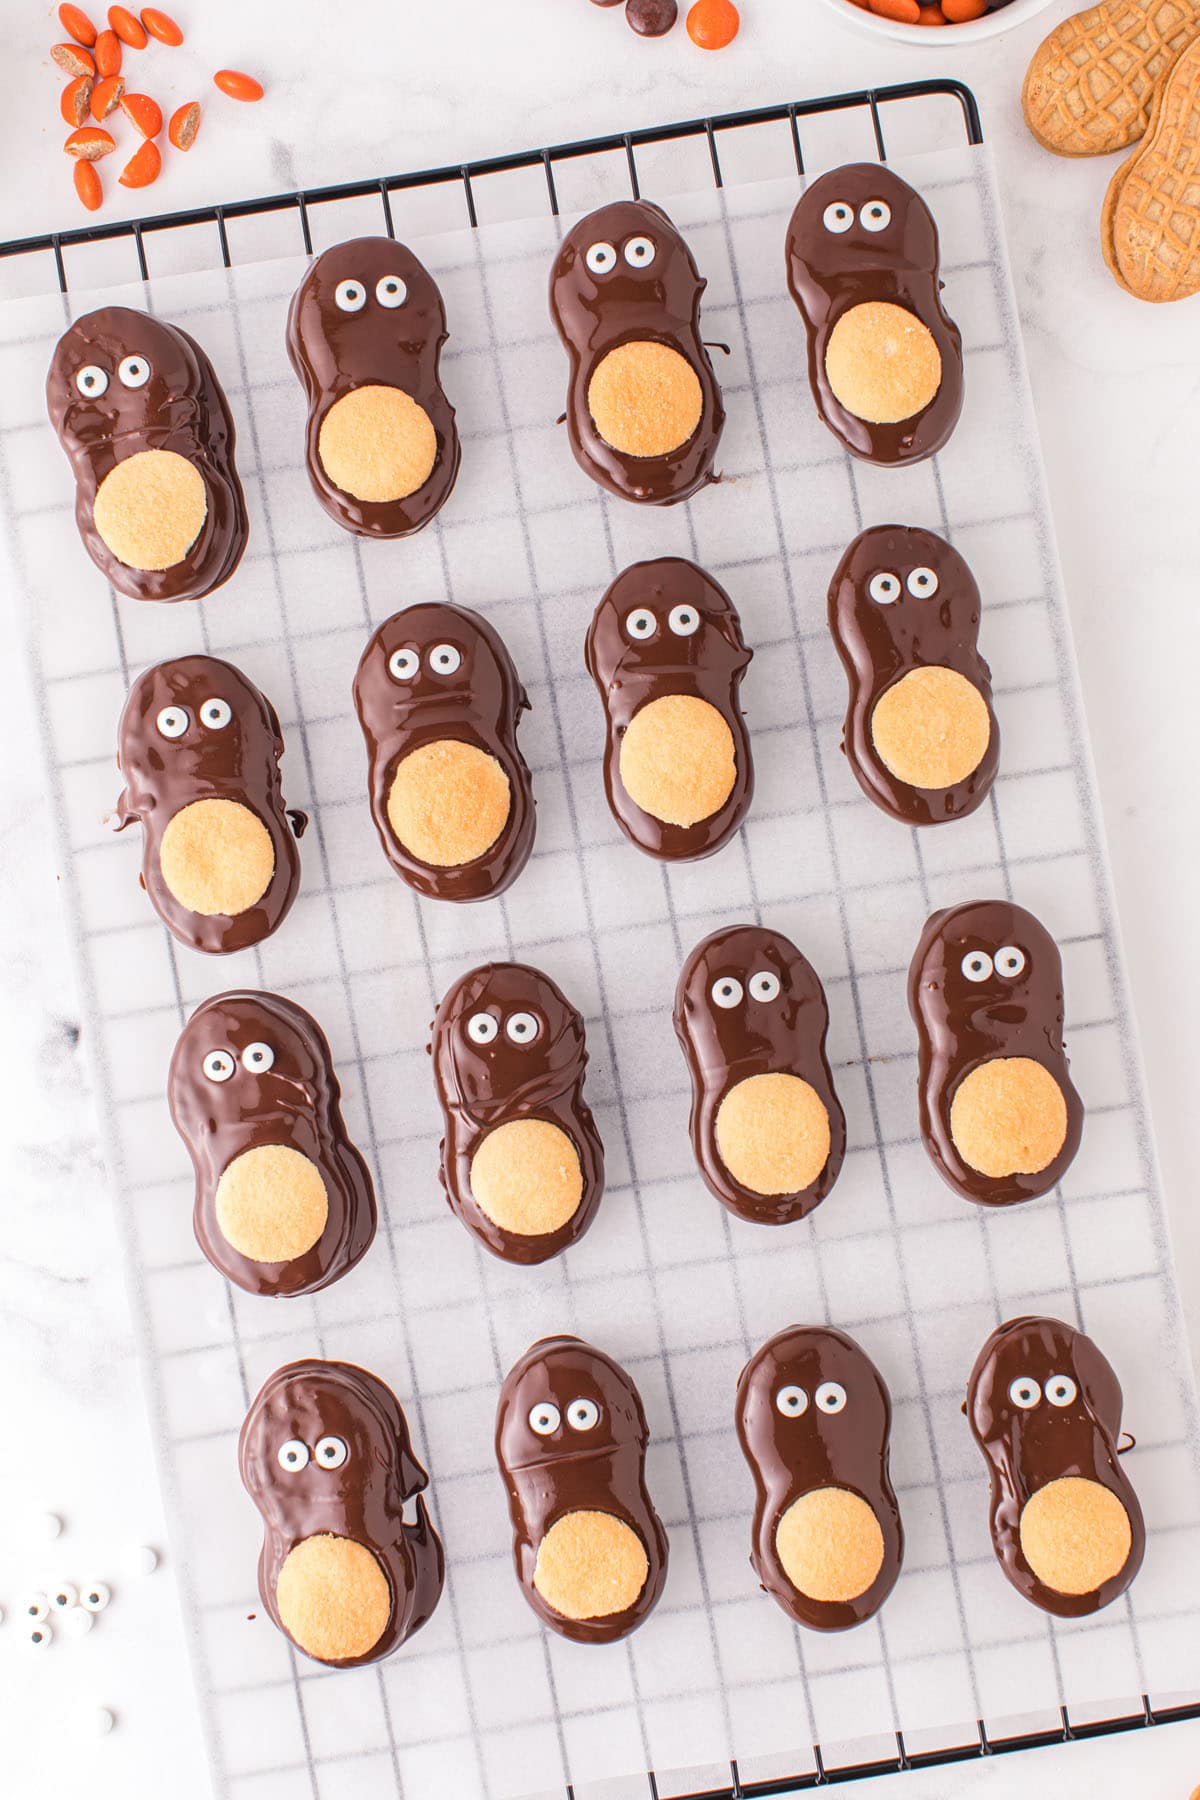
Pro-Tip: Pour out a bowl of mini Nilla wafers and open the candy eyes before you start decorating the cookies. Having everything open and prepared will make the process much easier. - Add two candy eyes to the top half of each cookie.
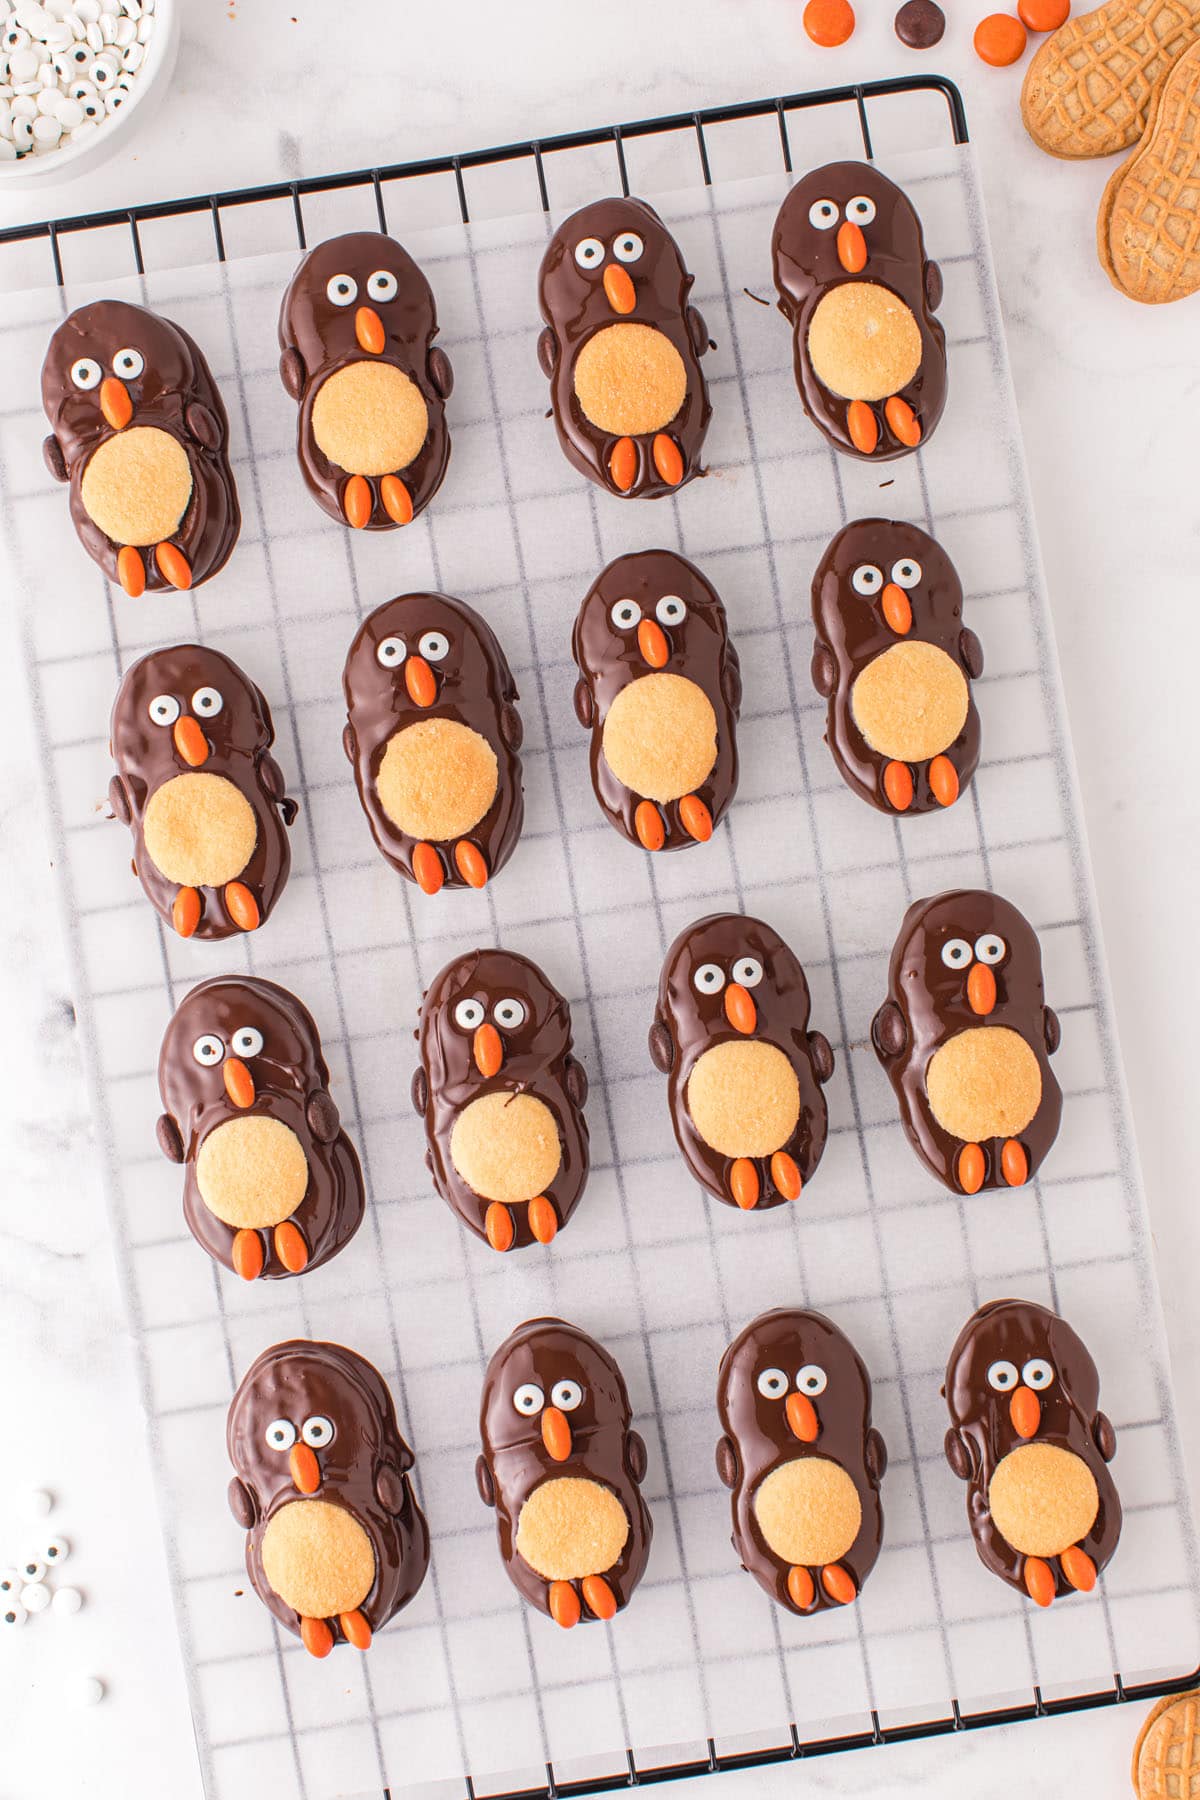
- Add ½ of an orange Reese’s pieces, cut side down, for the nose.
- Place two halved orange Reese’s pieces feet, cut side down, horizontally below the mini Nilla wafer.
- Press two brown Reese’s pieces wings, one on either side of each cookie, just below the indent.
Pro-Tip: Prepare the Reese’s pieces before you start on the cookies. Separate the colors that you need and cut the orange ones in half. I also recommend pulling out a few extras, just in case you drop one or have other unexpected problems (like a few slip in your mouth). - Refrigerate penguins for at least 3 hours or overnight.
- Serve and enjoy!
Pro Tip: Penguins can be eaten chilled or at room temperature.
Tips
- Prepare the Reese’s pieces before you start on the cookies. Separate the colors that you need and cut the orange ones in half. I also recommend pulling out a few extras, just in case you drop one or have other unexpected problems.
- Pour out a bowl of mini Nilla wafers and open the candy eyes before you start decorating the cookies. Having everything open and prepared will make the process much easier.
- Don’t overheat your chocolate! The peanut butter and butter will make it much more forgiving but you still don’t want to overheat it.
Storage Tips
- To Store: Once chilled, store these Penguins in an airtight container in the refrigerator for a week. You can store them at room temperature but the chocolate will soften and you may end up with messy, although delicious, penguins.
- To Freeze: You can store these penguins in the freezer for up to 6 months but thaw them in the refrigerator overnight before serving.
Frequently Asked Questions
Heat your chocolate in the microwave. After the first 30 seconds be sure to stir it well and then only heat it in 10-15 second increments. Even if the chocolate doesn’t look melted it may be heated through. That is why stirring it each time you heat it is so important!
You can buy candy eyes at most craft stores or you can easily find them here online.
Yes, you can easily make penguin eyes from black and white royal icing if you cannot find candy eyes or choose not to use them.
Other Easy Christmas Dessert Recipes
- Christmas Tree Brownies
- Reindeer Pretzel Rods
- Christmas Tree Brownie Cups
- DIY Peppermint Candy Bowls
- Christmas Crunch
- Meringue Wreath Cookies
- Christmas Tree Rice Krispie Treats
- Christmas Mints
- Christmas Lasagna
Peanut Butter Penguins
Ingredients
- 12 ounce bag dark chocolate chips
- ¼ cup creamy peanut butter
- 2 tbsp salted butter
- 16 ounce package Nutter Butter cookies
- 32 Mini Nilla Wafers
- 64 brown Reese’s pieces
- 48 orange Reese's pieces halved
- 64 Candy eyes
Instructions
- Combine the dark chocolate chips, creamy peanut butter and salted butter in a medium sized, microwave safe bowl.
- Microwave for 30 seconds and stir well. Continue to heat in 10-15 second increments, stirring between each increment, until completely melted and combined.
- Dip a Nutter Butter into the chocolate mixture until completely covered and remove with a fork underneath it to gently shake off any extra chocolate. Set on a wire rack or cutting board covered with parchment paper.
- Add a mini nilla wafer to the center of the bottom half of the cookie to make the stomach.
- Add two candy eyes to the top half and ½ of an orange Reese’s piece, cut side down, for the nose.
- Place two orange Reese’s piece halves, cut side down, horizontally below the mini nilla wafer to be the feet.
- Press two brown Reese’s pieces on as the wings, one on either side of the cookie, just below the indent.
- Repeat the process with each Nutter Butter until you have made all 32 penguins.
- Place the wire rack or board in the refrigerator and allow the penguins to set for at least 3 hours or overnight. Serve chilled or at room temperature (at room temperature you may end up with a smear of chocolate on your fingers when you eat them but they will be delicious.)
Jenn’s Notes
- To Store: Once chilled, store these Penguins in an airtight container in the refrigerator for a week. You can store them at room temperature but the chocolate will soften and you may end up with messy, although delicious, penguins.
- To Freeze: You can store these penguins in the freezer for up to 6 months but thaw them in the refrigerator overnight before serving.
- Prepare the Reese’s pieces before you start on the cookies. Separate the colors that you need and cut the orange ones in half. I also recommend pulling out a few extras, just in case you drop one or have other unexpected problems.
- Pour out a bowl of mini Nilla wafers and open the candy eyes before you start decorating the cookies. Having everything open and prepared will make the process much easier.
- Don’t overheat your chocolate! The peanut butter and butter will make it much more forgiving but you still don’t want to overheat it.

i love all the recipes and can;t wait to make some