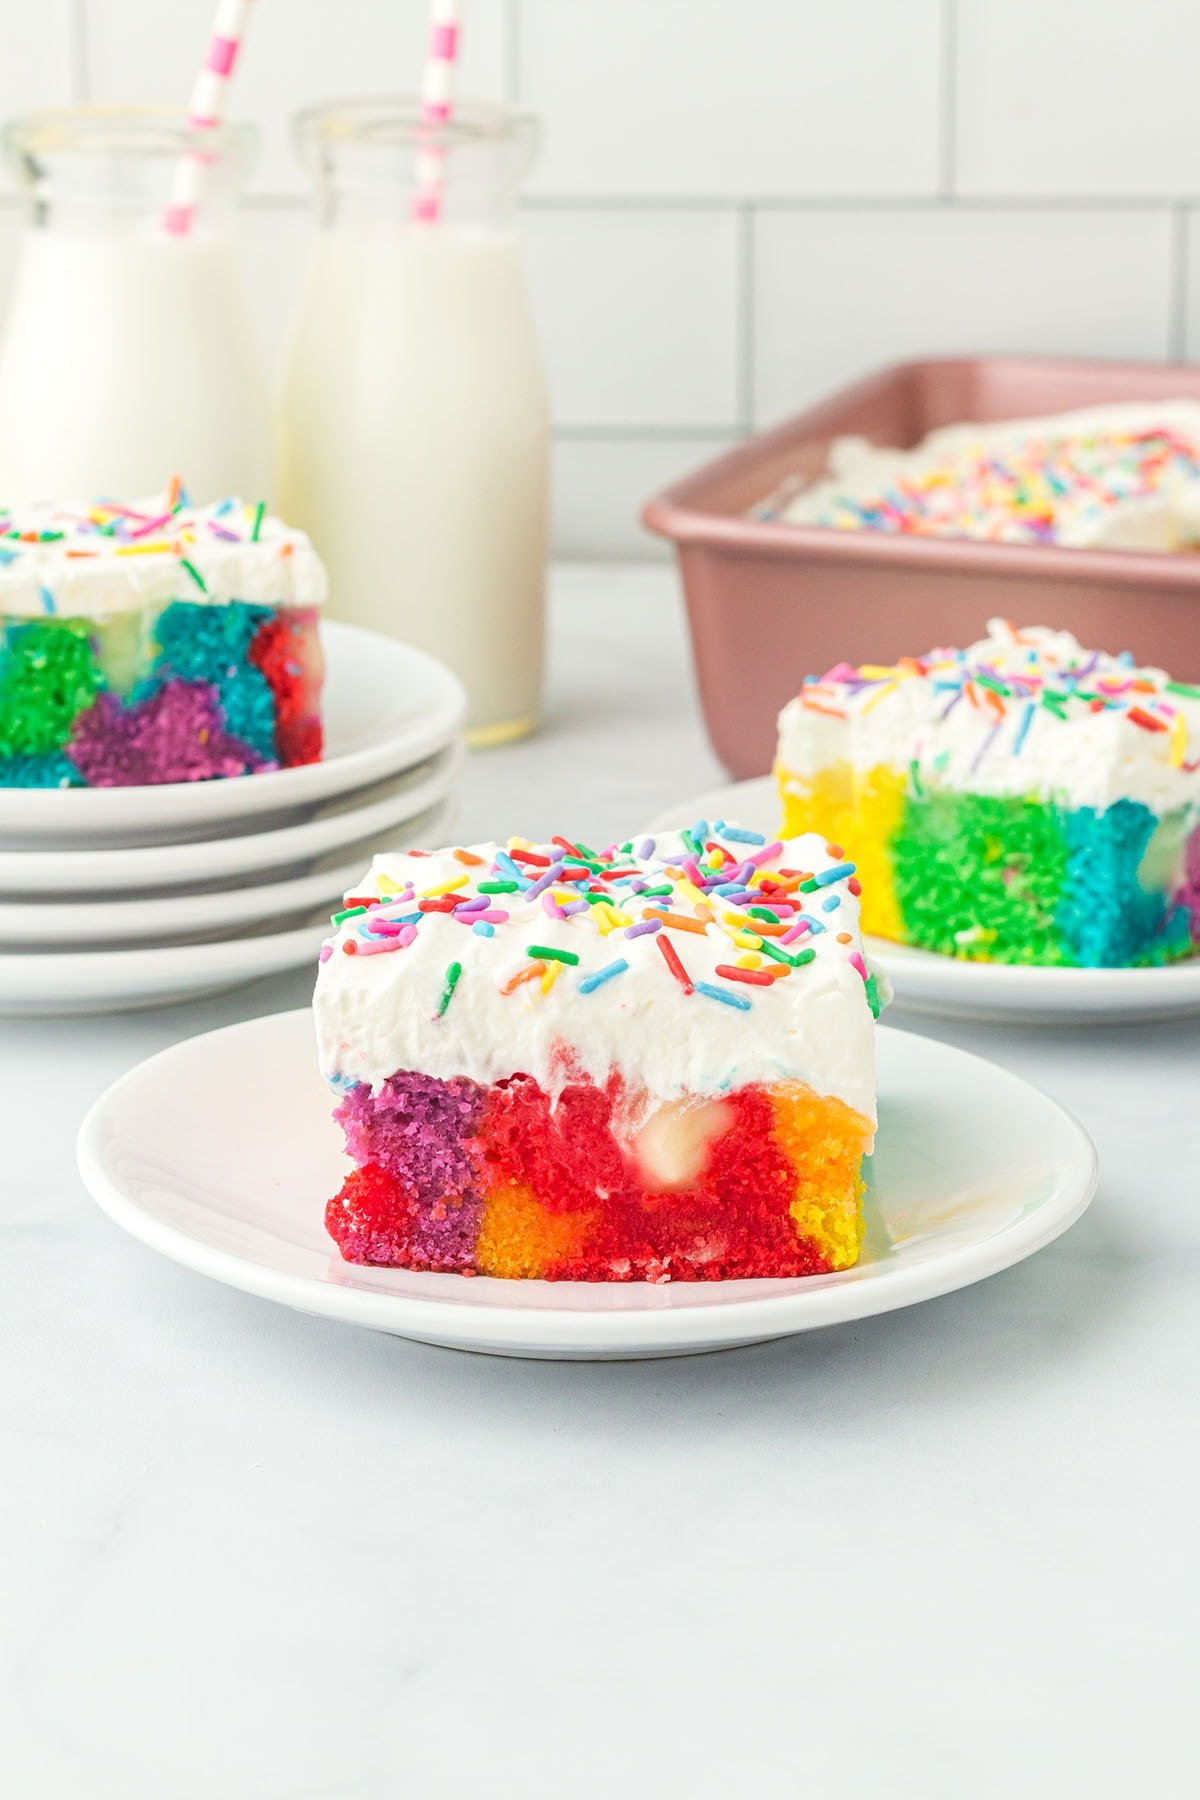
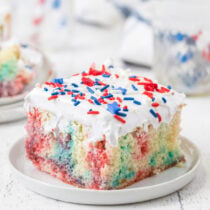
This pretty Rainbow Poke Cake is the perfect way to add a pop of color to any party table. Making a rainbow recipe from scratch is so quick and easy using simple kitchen staples and food coloring (giving it a tie dye cake look) to create an ultra-moist cake that’s been poked and filled with pudding and covered in fluffy frosting.
Easy Rainbow Cake (Tie Dye Cake)
A Rainbow Poke Cake is my made-from-scratch colorful creation of feel-good food (have you ever not smiled when you see a rainbow?) that not only looks bright and beautiful, but tastes delicious!
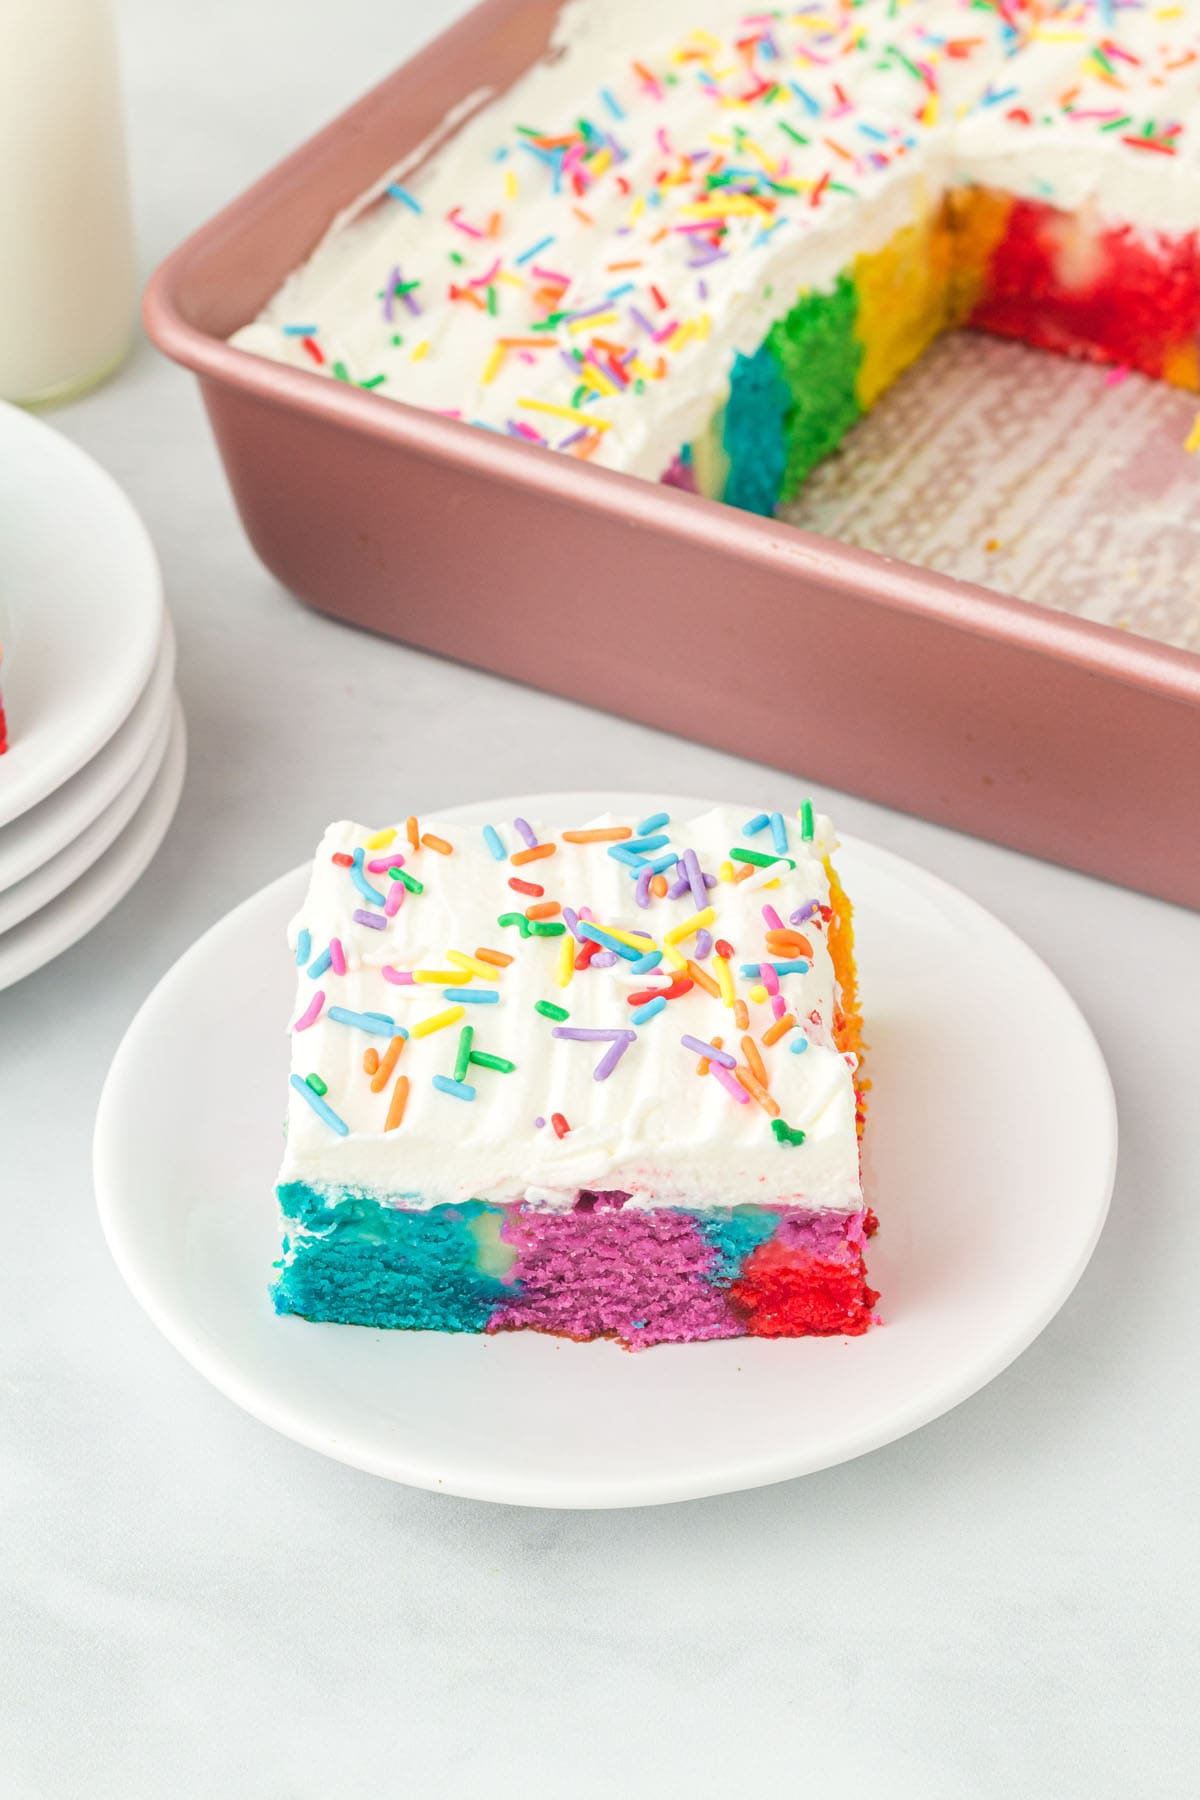
This recipe is really easy despite its intricate rows of red, orange, yellow, green, blue, and purple; trust me when I tell you that 6 simple squirts of vibrant food gels makes the most magnificent dessert in a matter of minutes with fun colors in every slice.
It starts with a from-scratch white batter (but if you want to save time, you can use a box of cake mix) that’s layered in multi-colored rainbow rows, then poked and filled with vanilla-flavored pudding and topped with a light and fluffy, cloud-like whipped cream frosting.
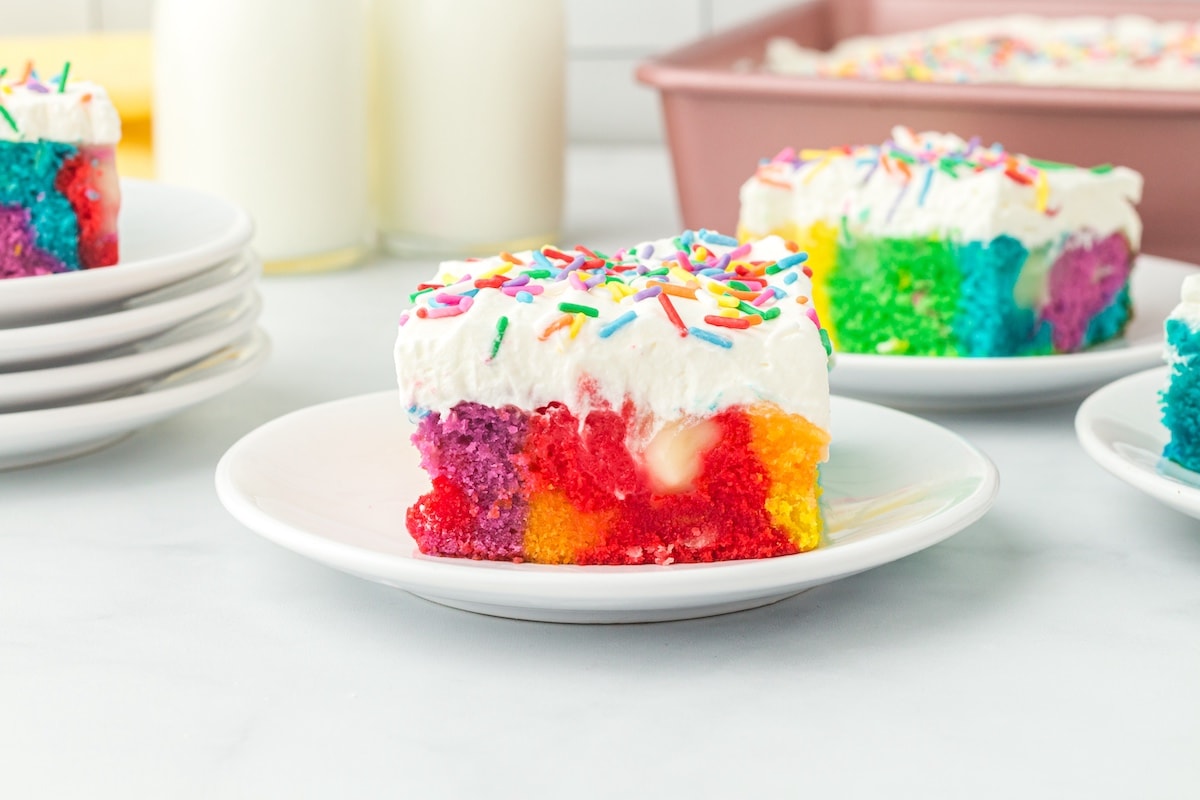
What makes my recipe so special is that I do not swirl the cake batter colors; instead, my pretty layered pattern prevents the colors from blending or bleeding, so it’s perfectly pretty for St. Patrick’s Day, Easter, or any celebration or party. It is almost like a tie dye cake!
For more colorful cakes and desserts, check out my other Rainbow Recipes and 8 Delicious Poke Cake Recipes.
Why We Love This Rainbow Poke Cake Recipe
- Quick and easy to prepare in 20 minutes.
- Homemade cake made with simple ingredients.
- Kid-friendly rainbow recipe that’s overflowing with fun and festive colors.
- It’s the happiest sheet cake you’ll ever make!
- Perfectly pretty for birthday parties, potlucks, Pride month, barbecues, or any special occasion.
Ingredients
- All-purpose flour
- Cornstarch
- Baking powder
- Salt
- Unsalted butter
- Granulated sugar
- Eggs
- Vegetable oil
- Vanilla extract
- Milk
- Gel food coloring
- Vanilla instant pudding mix
- Heavy cream
- Confectioners’ sugar
- Sprinkles (optional)
SEE FULL PRINTABLE RECIPE CARD BELOW
Substitutions and Additions
- Customize Your Cake: This recipe is so easy to customize for any themed party or holiday. Simply switch up the gel food colors to match your celebration. Make yellow, brown, and orange rows for Halloween, red, pink, and white for Valentine’s Day, or red, white, and blue for Fourth of July.
- Boxed Cake Mix: You can use a white or yellow boxed cake mix for this recipe to save some time.
- Tasty Toppings: Cover your cake with gold sprinkles or gold coins for St. Patrick’s Day, festive sprinkles (such as nonpareils, sugar pearls, and jimmies) for a birthday party, fresh fruit, or colorful candy.
Recommended Tools
- Mixing bowls of various sizes
- Spatula
- Electric mixer
- Whisk
- 9” x 13” cake pan
- Non-stick cooking spray
- Wooden spoon or something else with a round end for poking holes in the cake
How to Make Rainbow Poke Cake
Rainbow Poke Cake is filled with rows of rainbows in every sweet slice. This easy recipe is a fun family activity and bakes into a super moist delicious dessert that’s perfect for a party!
Make the Rainbow Cake
- Mix: Mix together the ingredients, but don’t overmix or your cake will be dry.
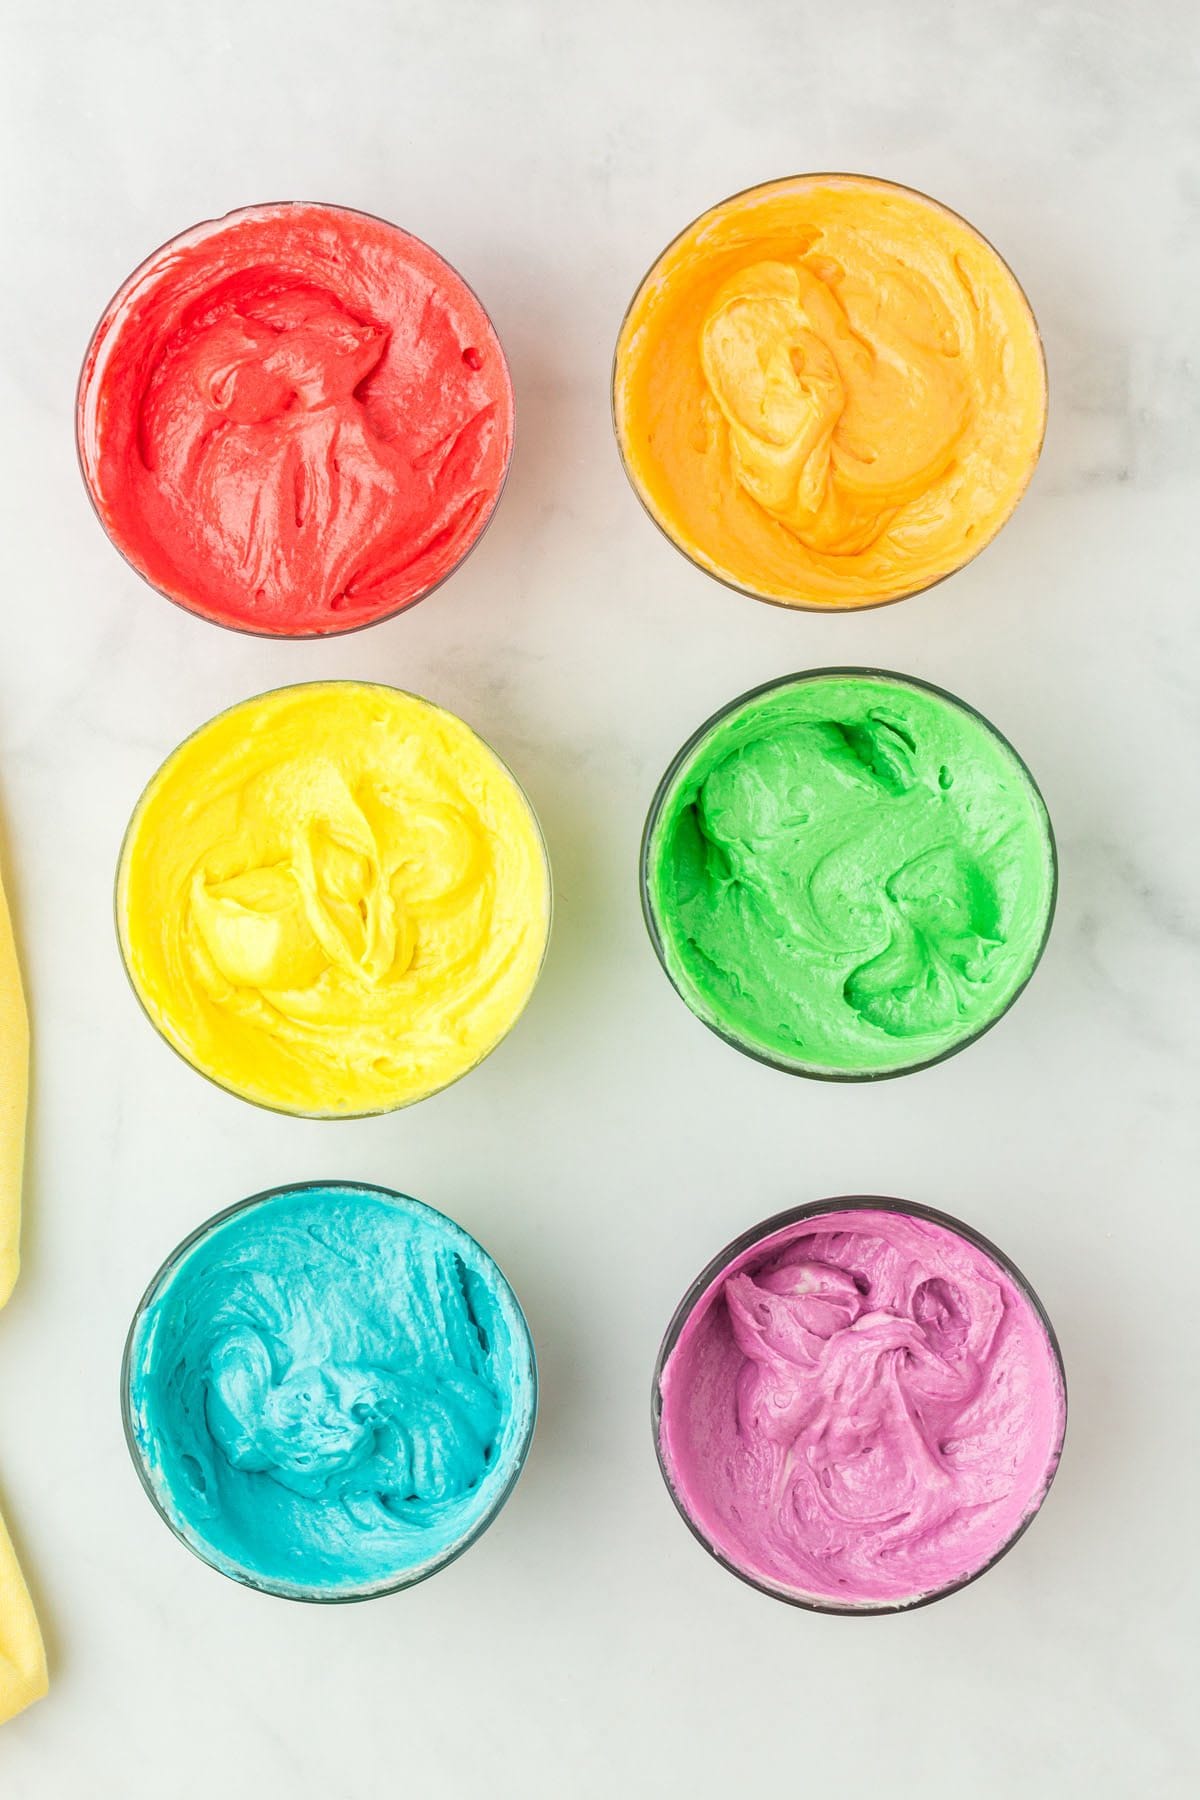
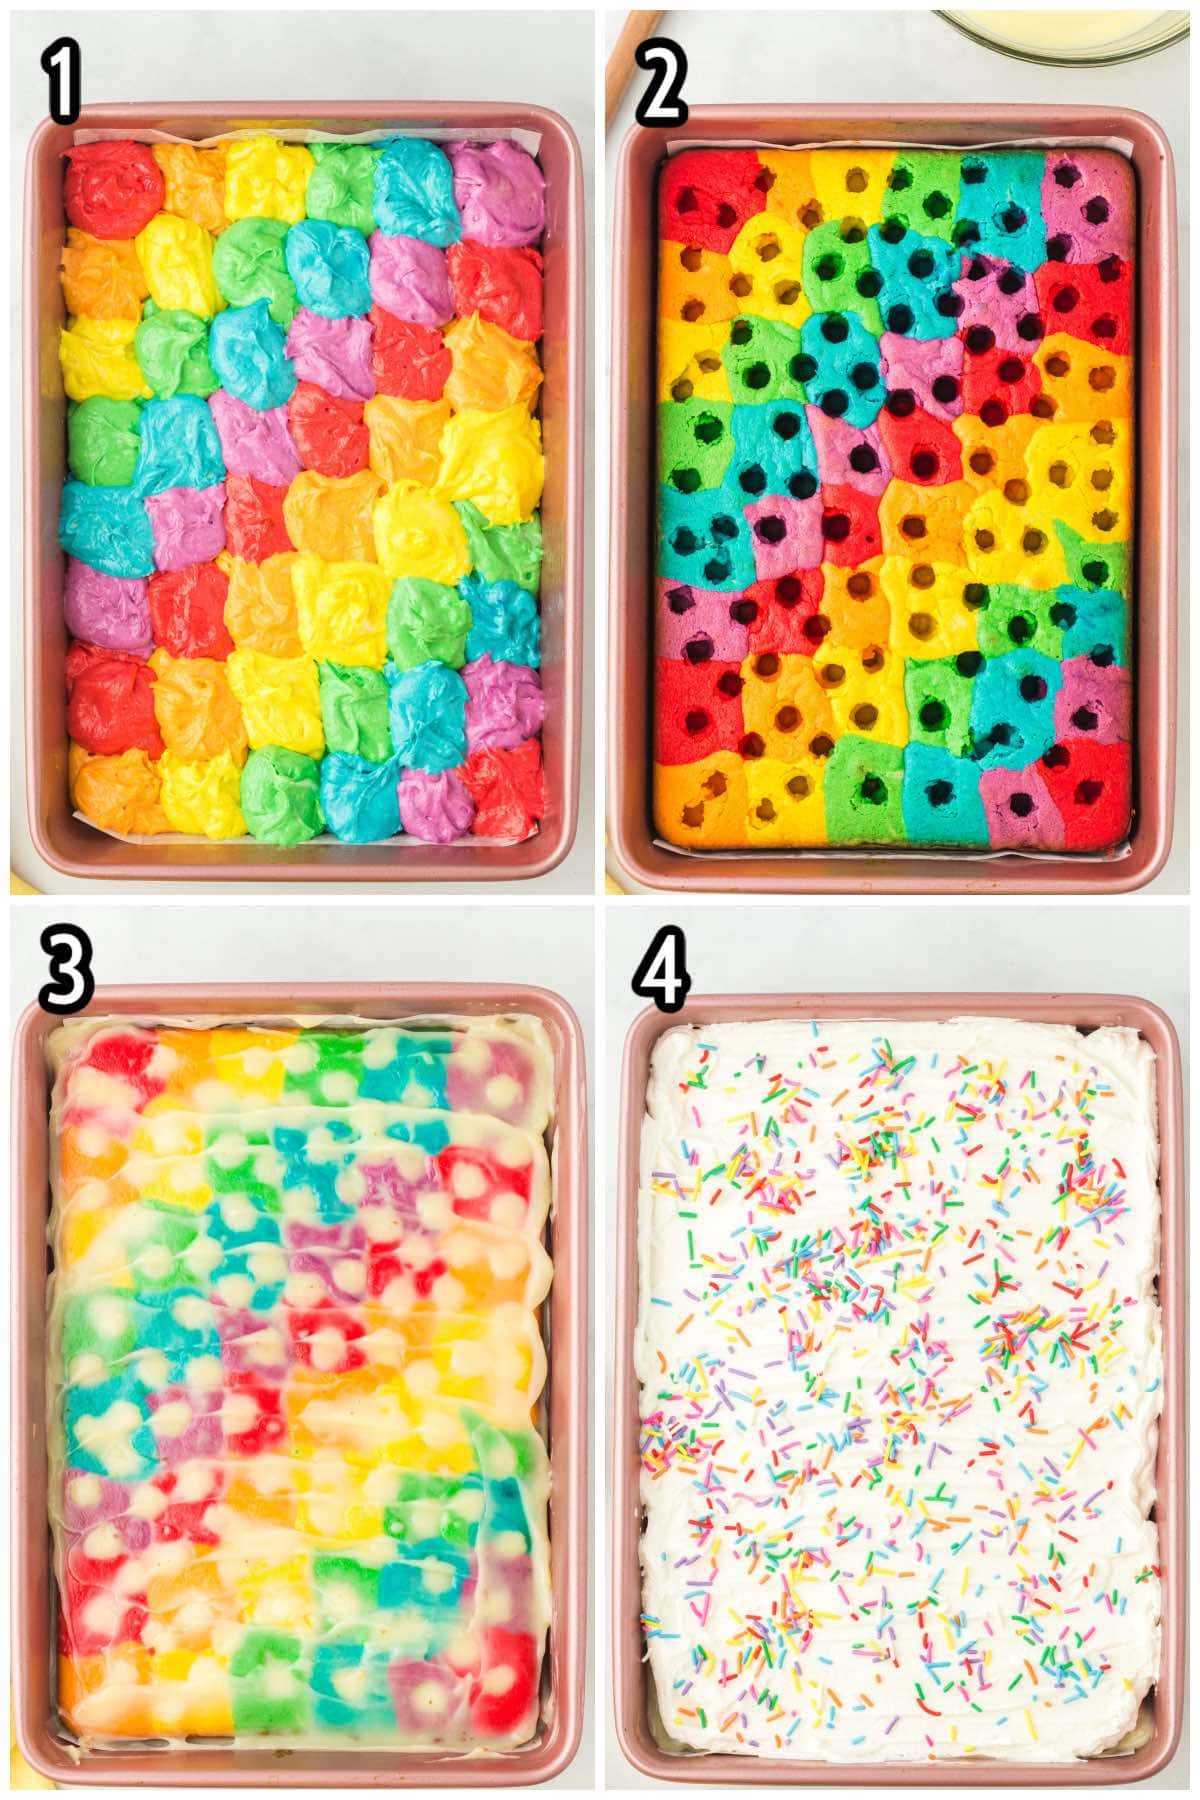
- Color: Separate the batter evenly between 6 bowls. and mix in a different color of gel food coloring to each bowl (red, orange, yellow, green, blue and purple).
Pro Tip: Stir just until color is mixed in well but try not to overmix the batter. - Make Rows of Rainbows: Scoop a small amounts of batter starting in the top corner and then alternate colors as you move throughout the pan (see recipe card and photo for detailed instructions).
Pro Tip: There should be 6 spoonfuls of batter across each row of the vertical-facing cake pan. You don’t want any space between the rows so give the pan a little counter tap to level it out or use a spoon to fill in any holes in the batter before baking. - Bake: Bake at 350 degrees for 30 minutes or until toothpick inserted in middle comes out clean.
Prepare The Pudding: While the cake is baking, whisk together vanilla pudding mix and cold milk for two minutes until the pudding thickens.
Poke and Fill:
- Poke multiple holes ¾ of the way through the cake with the round handle of a wooden spoon.
Pro Tip: You’ll want lots of holes here for the pudding to go into. - While cake is still warm, spread the pudding evenly over the cake and into each of the poke holes.
- Let set in refrigerator for 1 hour before adding frosting.
Make The Frosting: Beat together the heavy cream and confectioners’ sugar until soft peaks form, about 5 minutes.
Frost: Spread frosting evenly over cake. Add sprinkles if desired.
Tips
- You must let this cake chill in the refrigerator for the full hour before adding the frosting, otherwise you might end up with a soggy bottom. The pudding needs time to set up.
- I like to use the back of a wooden spoon to poke holes in the cake but you can use a straw, toothpick, fork etc., but you might have smaller holes.
Storage Tips
- To Store: Store your cake in a sealed food storage container in fridge for up to 3 days.
Frequently Asked Questions
For these bright colors, I used the brand Chefmaster Liqua-gel in the colors: super red, neon brite orange, lemon yellow, leaf green, neon brite blue and neon brite purple.
Yes, with the milk in the pudding and the heavy cream in the frosting, this cake must be refrigerated. Store it in a sealed food safe container in the fridge for up to 3 days.
The pudding and whipped topping in the cake is best fresh and not as good once thawed from the freezer. If this cake is frozen and then brought back to room temperature, it can get quite mushy. It’s recommended to eat this cake fresh.
The vanilla pudding is what gives this cake the “poke cake” name. You could just make a Rainbow Cake and bake this as a normal cake with frosting but it won’t be as moist and soft without the pudding as directed.
Other Easy Cake Recipes
- Strawberry Icebox Cake
- 7-UP Cake
- Heaven On Earth Cake
- Cake Mix Hacks
- Cinnamon Roll Bundt Cake
- Crockpot Chocolate Lava Cake
- Copycat Dairy Queen Ice Cream Cake
- Oreo Poke Cake
Rainbow Poke Cake
Ingredients
Rainbow Cake:
- 3 cups (420 grams) all-purpose flour
- 1 tbsp cornstarch
- 2 tsp baking powder
- ½ tsp salt
- 1 cup (227 grams) unsalted butter slightly melted
- 1½ cups (300 grams) granulated sugar
- ¼ cup vegetable oil
- 4 large eggs room temperature
- 1 tbsp vanilla extract
- 1 cup milk (2% or whole milk)
- gel food coloring: red, orange, yellow, green, blue, purple*
Pudding:
- 1 box (4-serving box, around 100 grams or 3.4 ounces) vanilla dry instant pudding mix
- 2 cups milk (2%)
Whipped Cream Frosting:
- 2 cups heavy cream (35%)
- ¾ cup (90 grams) confectioners’ sugar
Instructions
Rainbow Cake:
- Preheat oven to 350 degrees F.
- Spray a 9” x 13” cake pan with non-stick cooking spray then line bottom with parchment paper and spray again with non-stick cooking spray. Set pan aside for now.
- In a medium bowl, whisk together flour, cornstarch, baking powder and salt until well mixed. Set aside.
- In a large bowl, beat together butter, granulated sugar and vegetable oil until well creamed together (about 5 minutes of beating with electric mixer on high speed).
- Beat in eggs and vanilla extract until well mixed (about 1 minute).
- Beat half of the dry ingredients into the wet ingredients. Don’t overmix – just beat until most of the flour is combined.
- Beat in all of the milk until combined (again, don’t overmix).
- Beat in the remaining half of the dry mixture just until you no longer see dry flour in the batter. Don’t overmix or your cake will be dry.
- Separate batter evenly between 6 bowls. This works out to be about 235 grams of batter per bowl.
- Use gel food coloring to color each bowl of batter a different color of the rainbow (red, orange, yellow, green, blue and purple). Stir just until color is mixed in well but try not to overmix the batter.
- Lay the prepared cake pan vertically in front of you on the counter. Use a spoon to scoop a small amount of red batter (about 1/8 of the red batter) into the top left side of the cake pan. Then move onto a scoop of orange, then yellow, green, blue and purple. There should be 6 spoonfuls of batter in the top row of the vertical-facing cake pan.
- Start on the second row of batter by starting with the orange batter, then yellow, green, blue, purple and finishing off on red. Again, 6 spoonfuls of batter across the second row. As you start each row, start with the next color in the rainbow. So for example, the first row was red first, the second row was orange first, the third row will be yellow first, and so on. Continue until you use up all the batter and fill the cake pan. You don’t want any space between the rows so give the pan a little counter tap to level it out or use a spoon to fill in any holes in the batter before baking.
- Place cake in oven for 30 minutes or until toothpick inserted in middle comes out clean.
- While cake is still warm, add the vanilla pudding.
Vanilla Pudding:
- In a large bowl, whisk together vanilla pudding mix and cold milk for two minutes until pudding thickens.
- Using the round handle end of a wooden spoon, poke multiple holes ¾ of the way through the cake. You’ll want lots of holes here for the pudding to go into.
- Use a spatula to spread pudding evenly over the cake and into each of the poke holes.
- Let set in refrigerator for 1 hour before adding frosting.
Whipped Cream Frosting:
- In a large bowl, beat together heavy cream and confectioners’ sugar until soft peaks form (about 5 minutes.
- Spread frosting evenly over cake. Add sprinkles if desired.
- Store in a sealed food storage container in fridge for up to 3 days.
Jenn’s Notes
- You can use a white or yellow boxed cake mix for this recipe.
- You must let this cake chill in the refrigerator for the full hour before adding the frosting, otherwise you might end up with a soggy bottom. The pudding needs time to set up.
- I like to use the back of a wooden spoon to poke holes in the cake but you can use a straw, toothpick, fork etc., but you might have smaller holes.

Am will be trying this cake for my niece but a video tutorial would have been great.
So pretty
I made this rainbow poke cake along time ago. It is very good
I’m glad I found this.
Looks delicious and so pretty! Will try this recipe!
How and when do you take the parchment paper out from under the baked cake?
You can cut the parchment to hang out the sides a little bit (I didn’t do this because of the photos – it would block the full cake). Then you can basically lift it out and put it on the serving tray. Or you can just leave the parchement in there and just cut and serve as normal.