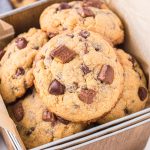
Browned Butter Chocolate Chip Cookies
This Browned Butter Chocolate Chip Cookies recipe has an easy hack to make a bag of cookie mix taste homemade. Simply combining 4 basic ingredients with a mix bakes the best batch of rich and nutty sweet treats.
Servings: 24 cookies
Calories: 153kcal
Ingredients
- ½ cup (1 stick) salted butter
- 17.5 ounce bag chocolate chip cookie mix
- 1 tbsp dry milk
- 1 large egg
- 4.25 ounce blue Symphony chocolate bar roughly chopped
Instructions
- Melt the butter in a medium skillet or saucepan over medium heat. Stir often and heat until browned, about 5-10 minutes. It should be a golden color with little specks of brown in it. You don’t want to burn it. Once you see the brown specks, it is browned and should be removed from the heat.
- Scrape all of the melted butter into a shallow bowl and allow to cool at room temperature for 5 minutes.
- Cover the bowl and place it in the refrigerator for 20-25 minutes or until soft but no longer a liquid.
- Preheat the oven to 375 degrees Fahrenheit and prepare a baking sheet with parchment paper or a silicone baking mat.
- In a medium sized mixing bowl, whisk together the cookie mix and dry milk.
- Add in the soft browned butter and egg and mix until completely combined. Do not overmix, the mixture will be crumbly but form a dough if pressed together.
- Mix in the chopped chocolate bar, kneading the dough slightly to evenly distribute the chocolate.
- Use a 2 Tablespoon cookie scoop to scoop out cookies and place on the prepared baking sheet.
- Bake for 7-10 minutes or until the edges just begin to brown and the top is set.
- Remove from the oven and allow the cookies to cool for 5 minutes before removing from the cookie sheet.
- Serve warm or cooled.
Notes
Storage:
- To Store: After these cookies are completely cooled, store them in an airtight container or ziploc bag for 5-7 days at room temperature.
- To Freeze: You can freeze your baked cookies too. Make sure they are well wrapped and placed in an airtight, freezer safe container or bag, for up to 2 months.
- To Reheat: Thaw frozen cookies in the refrigerator overnight and warm them for a few seconds in the microwave for a warm, “fresh from the oven” feel.
- You can make larger cookies by using an ice cream scoop (⅓ cup) and baking them for 10-12 minutes.
- Don’t brown your butter over high heat! It may seem like it takes too long to brown the butter over medium or medium low heat but it is better to take your time than to burn your butter. Burnt butter does not taste nearly as delicious as brown butter. Be patient and use a medium low or medium heat.
- Keep stirring while browning the butter. Once the butter has melted it will start to foam slightly and it may make it difficult for you to see if the butter has browned or not. By stirring the melted butter you will be able to see when the color has changed and avoid burning your butter. It will also even out the temperature so that you don’t burn the bottom of the butter before the rest has browned.
- Pay attention to the smell of your butter while you are cooking it. Browned butter smells buttery and nutty and very different from regular butter. However, you will notice if it starts to burn because it will begin to smell bitter. Once it smells nutty and has brown bits on the bottom with a golden color to the liquid, it is browned and should be removed from the heat.
- Use a spatula to scrape out ALL of the browned butter. The most flavorful part of the brown butter is the browned milk solids which tend to settle at the bottom of the pan. If you just pour the butter into a bowl you will miss out on all those delicious little solids. Be sure to scrape out your pan (carefully! It will be hot!) and get all of that flavor in your cookies.
- It’s best to brown the butter in a stainless steel pan because it’s easier to see the browned butter color. You can also use a non-stick pan, but it will be harder to see the color.
Nutrition
Calories: 153kcal | Carbohydrates: 19g | Protein: 1g | Fat: 8g | Saturated Fat: 3g | Polyunsaturated Fat: 1g | Monounsaturated Fat: 1g | Trans Fat: 1g | Cholesterol: 18mg | Sodium: 71mg | Potassium: 33mg | Fiber: 1g | Sugar: 12g | Vitamin A: 139IU | Vitamin C: 1mg | Calcium: 10mg | Iron: 1mg
